


In this tutorial, we will build a custom ERC-721 NFT collection using thirdweb and Chainlink. We will use thirdweb ContractKit for the ERC-721 token standard, thirdweb deploy to deploy our smart contract to Mumbai Testnet, and Chainlink Data Feeds to fetch the realtime price of Matic to set the base price for minting NFT. We will build and deploy a smart contract that allows users to mint NFT. The user has to pay at least $1 in Matic to mint the NFT. We get the actual price conversion using Chainlink Data Feeds.

What is ERC-721?
ERC-721 is a free, open standard that describes how to build non-fungible or unique tokens on the Ethereum blockchain. While most tokens are fungible (every token is the same as every other token), ERC-721 tokens are all unique.
The ERC-721 introduces a standard for NFT; in other words, this type of token is unique and can have a different value than another token from the same smart contract due to its age, rarity, or even something else like its visual.
Wait, visual?
Yes!
All NFTs have a uint256 variable called tokenId, so for any ERC-721 contract, the pair contract address, uint256 tokenId, must be globally unique. A DApp can have a "converter" that uses the tokenId as input and outputs an image of something cool, like zombies, weapons, skills, or amazing kitties!
Why Use ContractKit?
When building with the thirdweb ContractKit, each feature you add to your smart contracts unlocks functionality in both the thirdweb Dashboard and SDK to help you build applications on top of them.
For example, if you implement the ERC721Base contract, you'll unlock the mint button in the dashboard and can use the mint function in the SDK, which automatically uploads and pins your metadata to IPFS!
What is Chainlink Data Feeds?
Chainlink is a decentralized network of oracles that securely enables smart contracts to interact with real-world data and services outside blockchain networks. With Chainlink, the traditional systems that currently power modern economies can connect to the emerging blockchain industry to generate more security, efficiency, and transparency in business and social processes.
Chainlink Data Feeds are the quickest way to connect your smart contracts to real-world data such as asset prices, reserve balances, and L2 sequencer health.
Setting Up the Environment
First of all, we will set up our environment and install dependencies. To get started, run the command below to create a new project by opening the terminal of your preferred IDE.
npx thirdweb create --contract
You will get something like this:
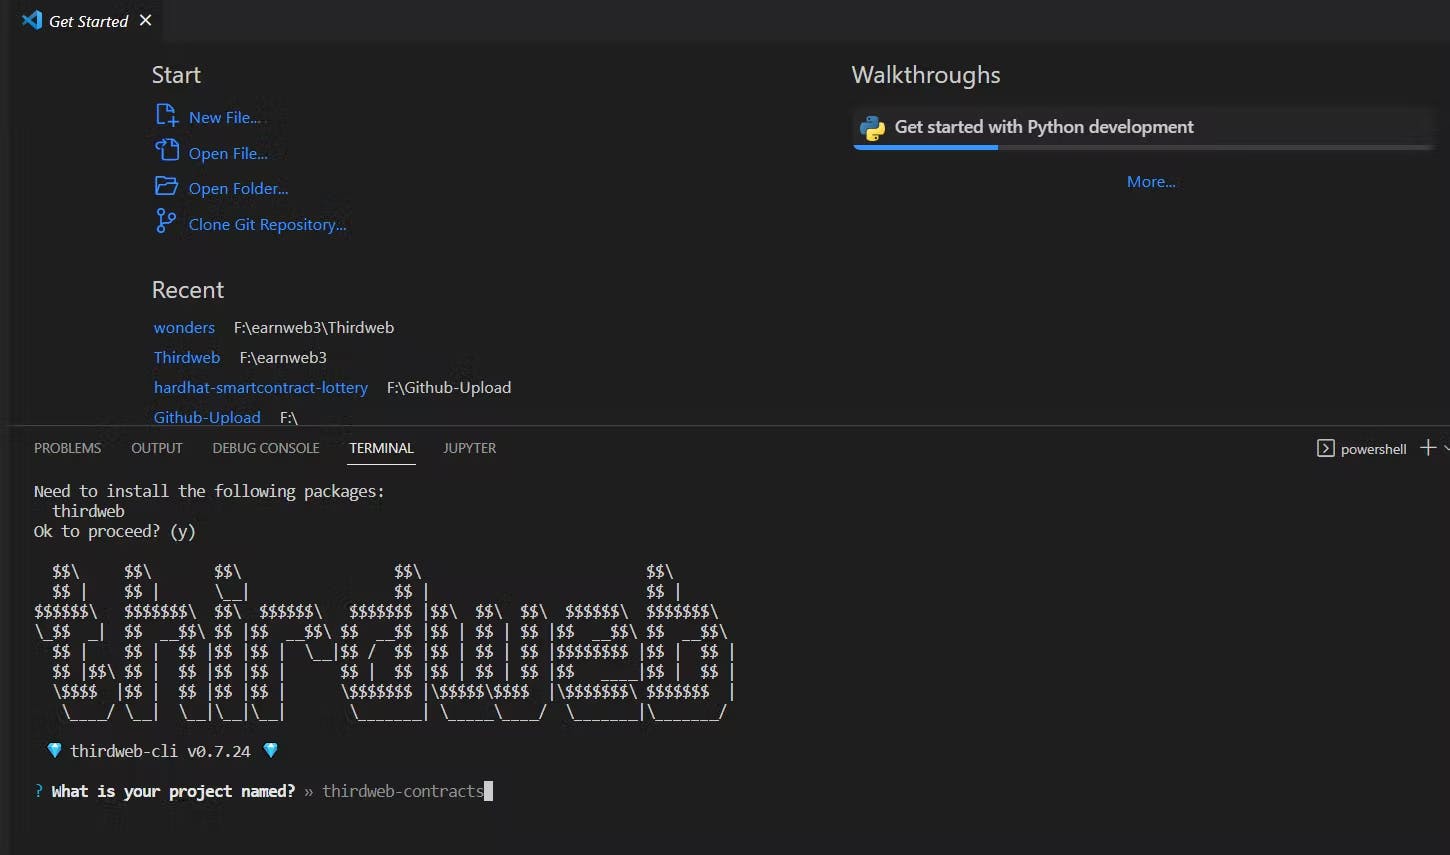
Now enter your preferred details.
After completion, navigate and open the new directory by running the following command.
cd dapp-name

code .
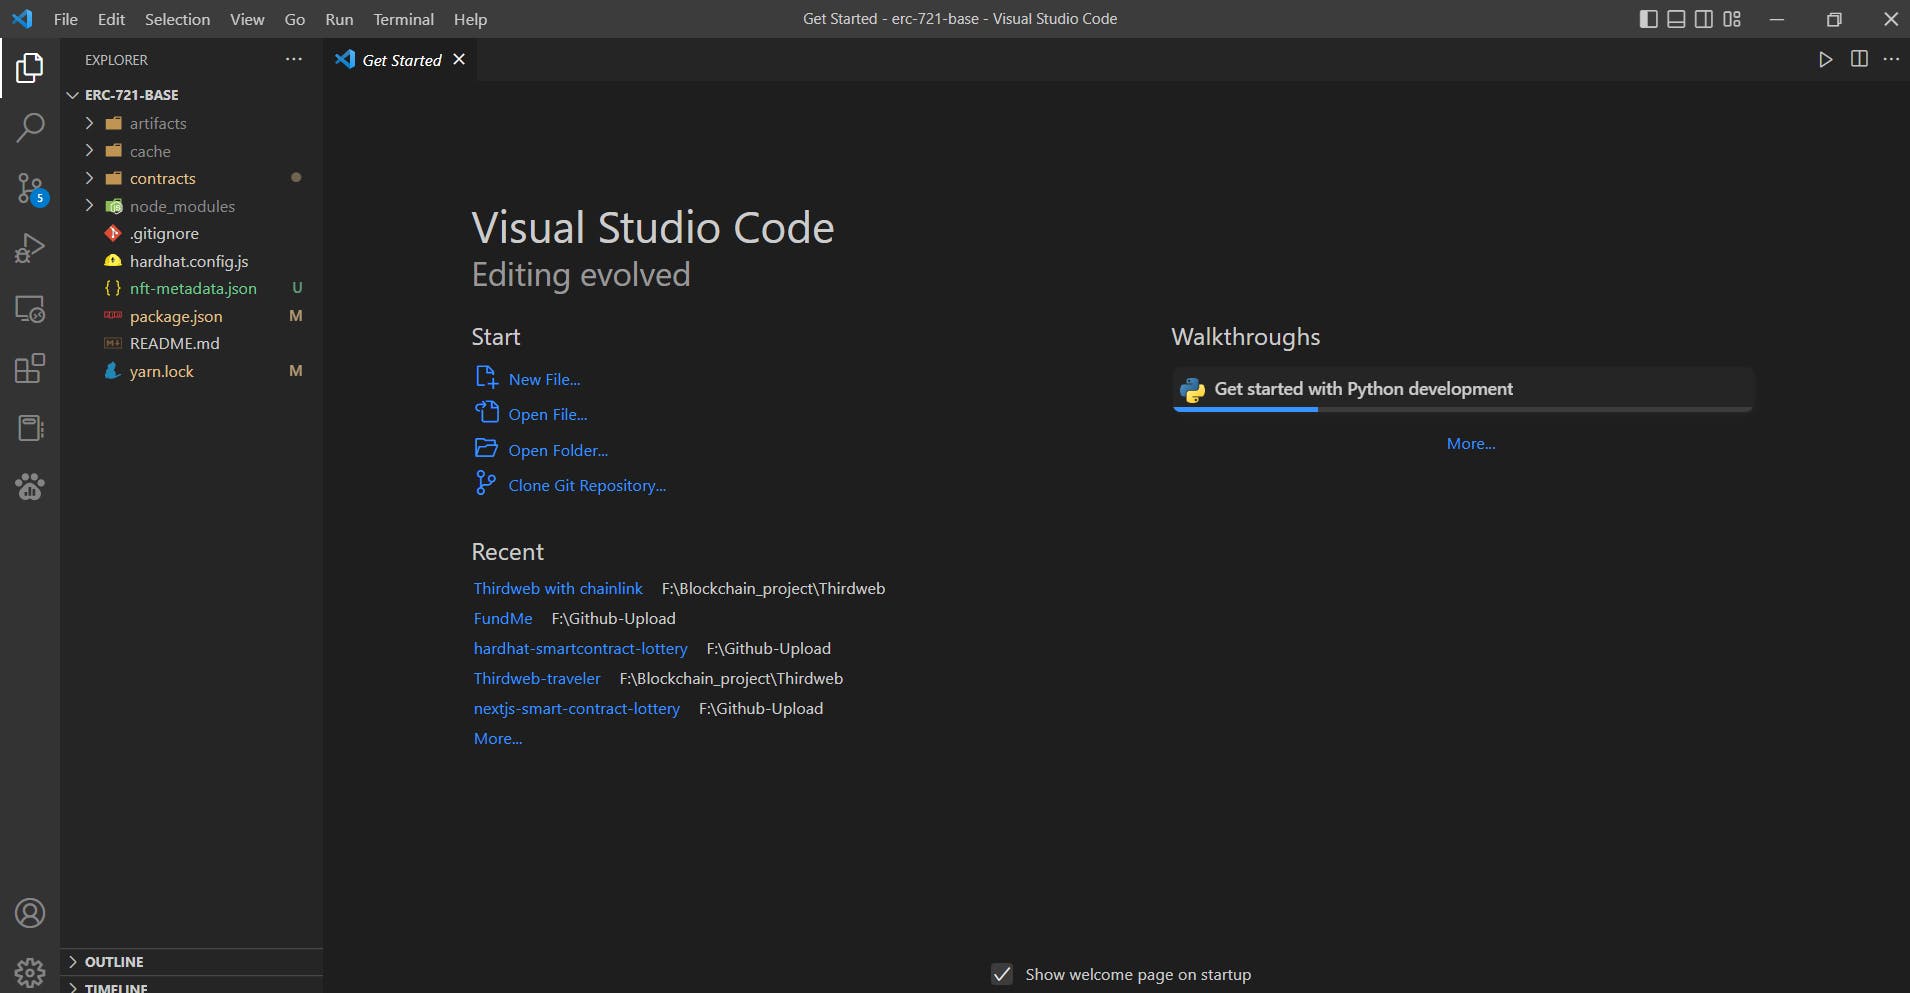
You will see this type of file structure.
LET'S BUIDL!
Now open the contracts directory and select the contract.sol file. You will see the demo code. Now copy the below smart contract code and replace it with the demo code.
Contract.sol
// SPDX-License-Identifier: MIT
/**
* @author Aayush Gupta  Github:AAYUSH-GUPTA-coder   Twitter:Aayush_gupta_ji
*
* Smart conntract to allow users to mint as many NFTs as they wanted to mint with only one condition that they have to pay a minimum of $1 to mint the NFT.
* Using `thirdweb` contractKit and deploy tool. Get real time price conversion using `Chainlink Data Feeds`
*/
pragma solidity ^0.8.0;

// thirdweb contract for ERC-721 token standard
import "@thirdweb-dev/contracts/base/ERC721Base.sol";
// thirdweb contract for counters
import "@thirdweb-dev/contracts/openzeppelin-presets/utils/Counters.sol";
// chainlink data feed
import "./PriceConverter.sol";

contract Contract is ERC721Base {
   using PriceConverter for uint256;

   using Counters for Counters.Counter;
   Counters.Counter private _tokenIdCounter;
   // Minimum price of NFT $1 in MATIC
   uint256 public constant MINIMUM_USD = 1 * 10 ** 18;


   /**
    * @dev ERC721Base library's constructor takes four Parameters
    * _name of the NFT, _symbol of the NFT,
    *  _royaltyRecipient (address) who will get a royalty on secondary sale, _royaltyBps (royality percentage)
    * we don't need to set Royality for the purpose of our smart contract. setting _royaltyBps to Zero
    * @param _name: name of the whole NFT bundle Collection
    * @param _symbol: symbol of the whole NFT bundle Collection
   */
   constructor(
       string memory _name,
       string memory _symbol,
       address _royaltyRecipient,
       uint128 _royaltyBps
   )
       ERC721Base(
           _name,
           _symbol,
           _royaltyRecipient,
           _royaltyBps
       )
   {}

   /**
    * @dev createToken mint the ERC721 Token / NFT with the check that the user have paid $1 to mint the NFT
    */
  function createToken() public payable
   {
       // require statement to check the user have paid $1 to mint the NFT
       require(msg.value.getConversionRate() >= MINIMUM_USD, "SEND_MORE_MATIC");

       // Increment it so next time it's correct when we call .current()
       _tokenIdCounter.increment();

       // Current counter value will be the minted token's token ID.
       uint256 newTokenId = _tokenIdCounter.current();

       // Mint the token
       _mint(msg.sender, newTokenId);

       // Default token Metadata on token minting
       string memory tokenURI = "https://ipfs.io/ipfs/QmVAUVEmr6pxqZq2KtLtjs52d2c91q5sKKhDZweQeqaH7Z";

       // setting default token Metadata
       _setTokenURI(newTokenId, tokenURI);
   }

   /**
    * @dev function to withdraw funds present in contract address to owner address. In this case, the address that deploy this smart contract
    */
   function withdraw() public onlyOwner(){
       (bool callSuccess, ) = payable(msg.sender).call{value: address(this).balance}("");
       require(callSuccess,"TRANSFER_FUND_FAIL");
   }

   /**
    * @dev view / Getter function to get the balance of the smart contract
    */
   function getContractBalance() public view returns(uint){
       return address(this).balance;
   }

   // A contract receiving Ether must have at least one of the functions

   // receive() is called if msg.data have value
   fallback() external payable {}

   // receive() is called if msg.data is empty
   receive() external payable {}

}
Note: I will explain the code below, but before seeing the explanation. Try to understand smart contracts by reading the code and comments.
Line 8: Declaring the Solidity version.
Line 11: Importing the thirdweb ERC721Base contract.
Line 13: Importing the thirdweb Counters contract. We will use it to increment and keep track of the tokenID of NFTs.
Line 15: importing ./PriceConverter.sol. We will use it to get the realtime price conversion of MATIC/USD.
Line 17: Inheriting from the ERC721Base contract to use all its functionalities.
Line 18: Using PriceConverter as the uint256 data type.
Line 20: Using Counters as Counters.Counter datatype.
Line 21: Setting up the minimum price of NFT in USD. Our case will be $1 due to the lack of testnet funds.
Line 34: constructor: ERC721Base library's constructor takes four Parameters
_name: name of the NFT
_symbol: symbol of the NFT
_royaltyRecipient: (address) who will get a royalty on a secondary sale
_royaltyBps: royalty percentage on secondary sale. 100 is 1% here.
Line 51: function createToken(): Allow the user to mint the ERC721 Token / NFT with the check that the user has paid $1 to mint the NFT.
Line 54: require to check that the user sends more than $1 in Matic value.
Line 57: _tokenIdCounter.increment() to increment the TokenID. So next time, it's correct when we call .current().
Line 60: Current counter value will be the minted token's token ID.
Line 63: _mint mint the NFT
Line 66: Giving a default NFT metadata. In our case, we have hard-coded the IPFS link.
Line 69: _setTokenURI function to set URI/Metadata of NFT.
Line 75: function withdraw: function to withdraw funds from contract address to owner address. In this case, the owner is the address that deploys this smart contract.
Line 83: View / Getter function to get the smart contract balance.
Line 90: A contract receiving Ether must have at least one of the functions. fallback is called if msg.data has a value.
Line 93: receive is called if msg.data is empty.
Woah... That's a long explanation.
Now, before moving to deploy our smart contract using thirdweb Deploy. We have to write PriceConverter.sol contract to get the value of MATIC in USD. We will use Chainlink Data Feeds to get the current value. Using Chainlink's services is quite easy. You can refer to the official Chainlink docs to learn about data feeds in-depth.
Create a new .sol file in the contracts directory name PriceConverter.sol and copy the below smart contract code.
PriceConverter.sol
PriceConverter is a smart contract to get the current exchange rate of MATIC to USD using Chainlink Data Feeds. We use PriceConverter as a library because we are not sending any Matic to the smart contract. We are only using it to get the value.
// SPDX-License-Identifier: MIT

/**
 * @author Aayush Gupta  Github:AAYUSH-GUPTA-coder   Twitter:Aayush_gupta_ji
 * smart contract to get the current price of MATIC / USD using `Chainlink Data feeds`
 */

pragma solidity ^0.8.8;

import "@chainlink/contracts/src/v0.8/interfaces/AggregatorV3Interface.sol";

 /**
     * Network: Mumbai
     * Aggregator: MATIC / USD
     * Address: 0xd0D5e3DB44DE05E9F294BB0a3bEEaF030DE24Ada
     */

library PriceConverter {

    /**
     * @dev function to get the Price of MATIC / USD.
     * The problem with this we get value with 8 float point while Matic/ETH have 18 float point.
     * Therefore we raise the power of our answer with 10 floating point.
     */
    function getPrice() internal view returns (uint256) {
        AggregatorV3Interface priceFeed = AggregatorV3Interface(
            0xd0D5e3DB44DE05E9F294BB0a3bEEaF030DE24Ada
        );
        (, int256 answer, , , ) = priceFeed.latestRoundData();
        return uint256(answer * 1e10); // 1* 10 ** 10 == 10000000000
    }

    /**
     * @dev function to get eth(matic) in USD.
     * Will get the actual ETH/USD conversion rate, after adjusting the extra 0s.
     */
    function getConversionRate(uint256 ethAmount)
        internal
        view
        returns (uint256)
    {
        uint256 ethPrice = getPrice();
        uint256 ethAmountInUsd = (ethPrice * ethAmount) / 1e18; // 1 * 10 ** 18 == 1000000000000000000
        // the actual ETH/USD conversion rate, after adjusting the extra 0s.
        return ethAmountInUsd;
    }
}
Note: Again, I will explain the code below before seeing the explanation. Please try to understand smart contracts by reading the code and comments.
Line 1: Specifying SPDX license type.
Line 8: Declaring the Solidity version.
Line 10: Importing the chainlink AggregatorV3Interface.sol contract.
Line 25: function getPrice() function to get the Price of MATIC / USD. The problem is that we get a value with 8 decimal places while Matic/ETH has 18 decimal places (i.e., 1 Ether == 1 ^ 18 wei). Therefore, we raise the power of our answer to ten decimal places.
Line 37: The function getConversionRate function will get the actual ETH/USD conversion rate after adjusting the decimal places.
BOOM You have created our smart contract with custom logic using thirdweb ContractKit and Chainlink Data Feeds.
Deploy our smart contract using thirdweb deploy
Use the CLI to ship our contract directly to any of thirdweb supported networks using their dashboard.
npx thirdweb deploy
Running this command will:
Compile all the contracts in the current directory.
Allow you to select which contract(s) you want to deploy.
Upload your contract source code (ABI) to IPFS.
Open the deploy flow in the dashboard for you to select one of the thirdweb-supported networks to deploy to.
You don't need to write your deploy script. You don't need your private key to deploy your smart contract, which saves you and eliminates any chance of exposing your private key.
After running the above command, you will get something like this:
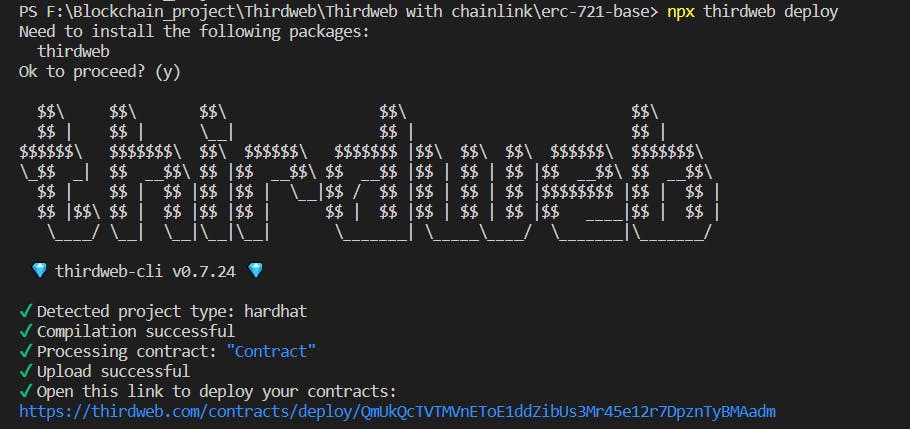
Now click on the link. You will open the deployment dashboard. Enter the details (name of the NFT, symbol of the NFT, address of royalty recipient, percentage of royalty, and network you want to deploy your smart contract) and click on the "Deploy Now" button.
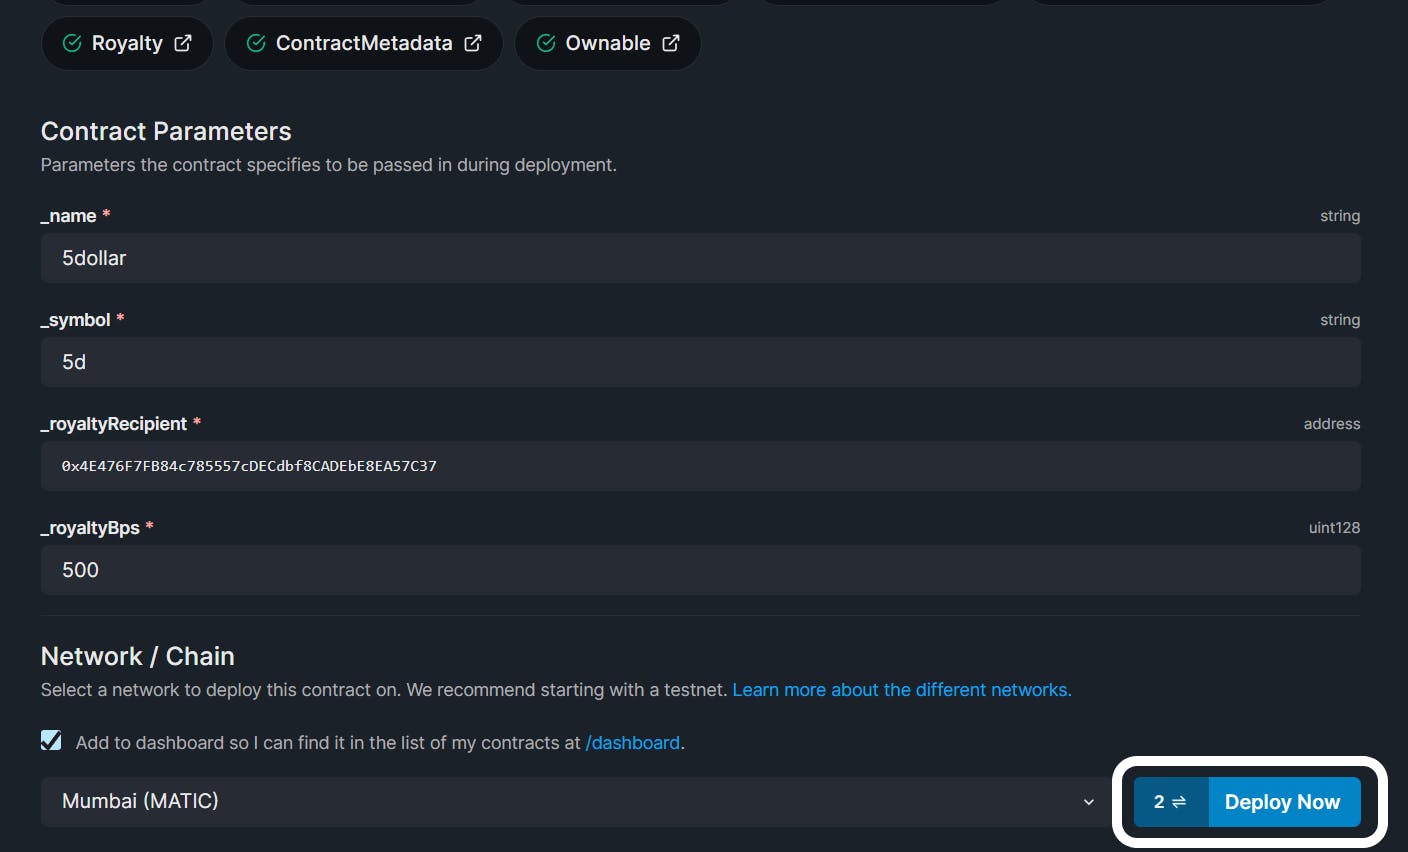
Congratulations! You have deployed your smart contract on the desired testnet.
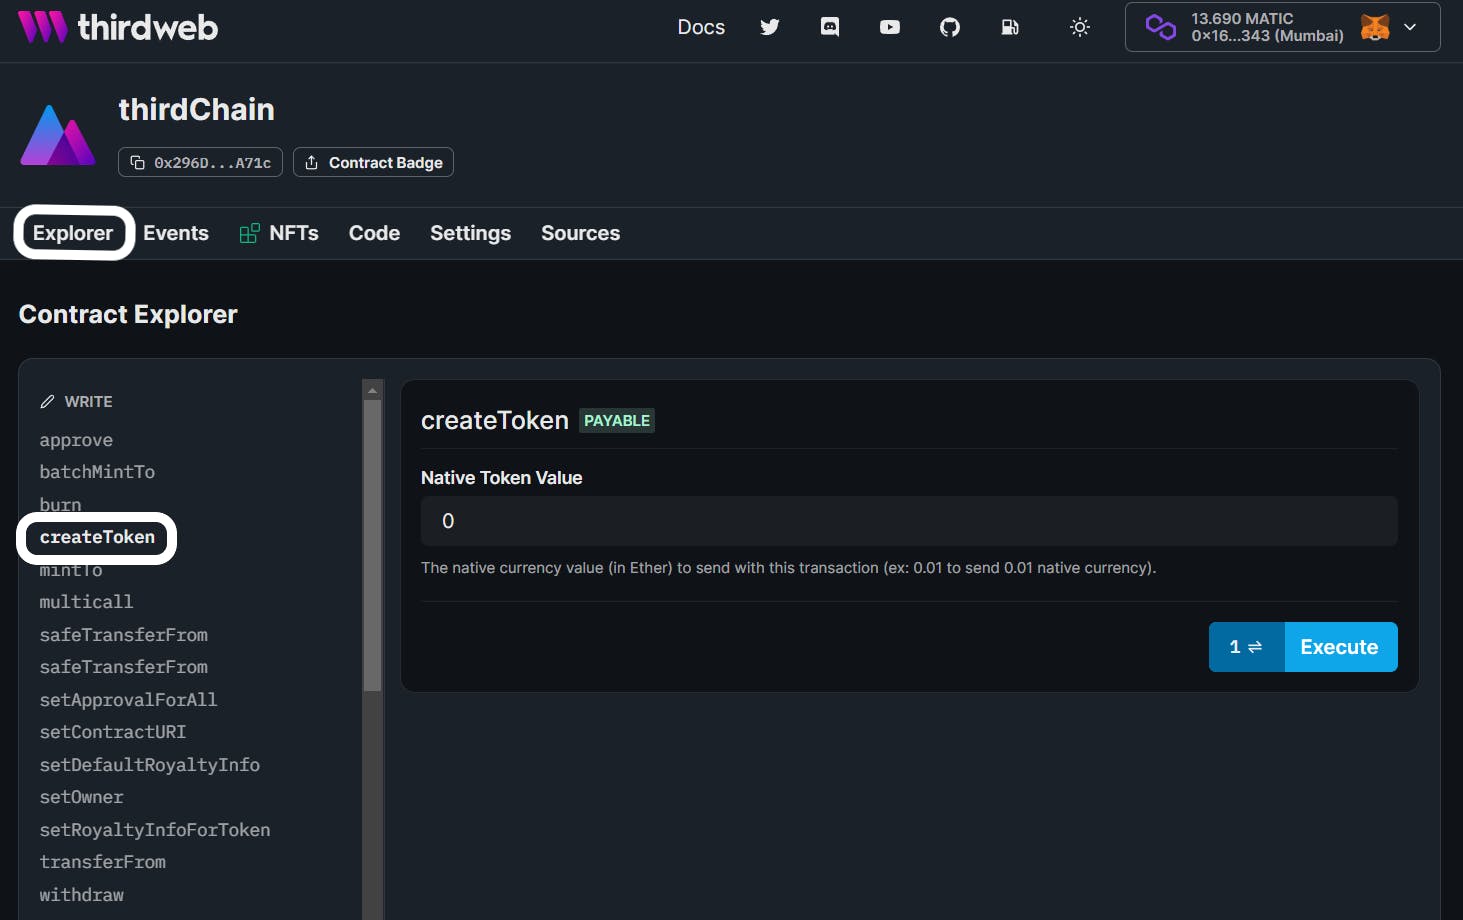
Mint the NFT
Go to the Explorer section of your NFT collection dashboard. You will see all the functions you can perform. For now, let's focus on our custom createToken function.
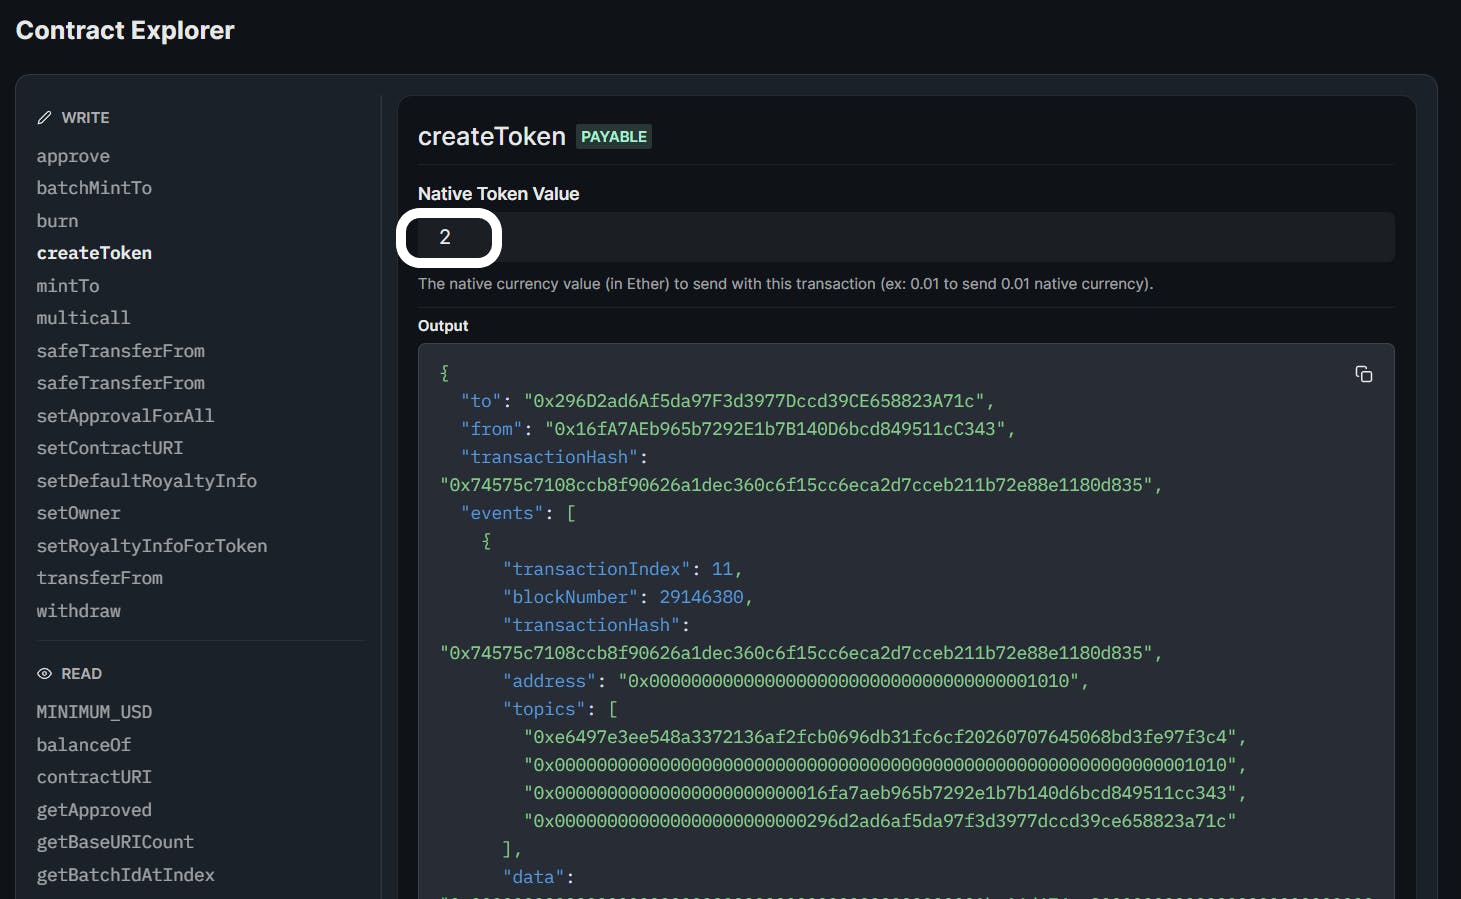
Now let's mint the NFT by sending Matic valuing more than $1. To keep things simple, we will set the value to 2.
Copy your contract address and paste the address on testnet Opensea to view your NFT with metadata.
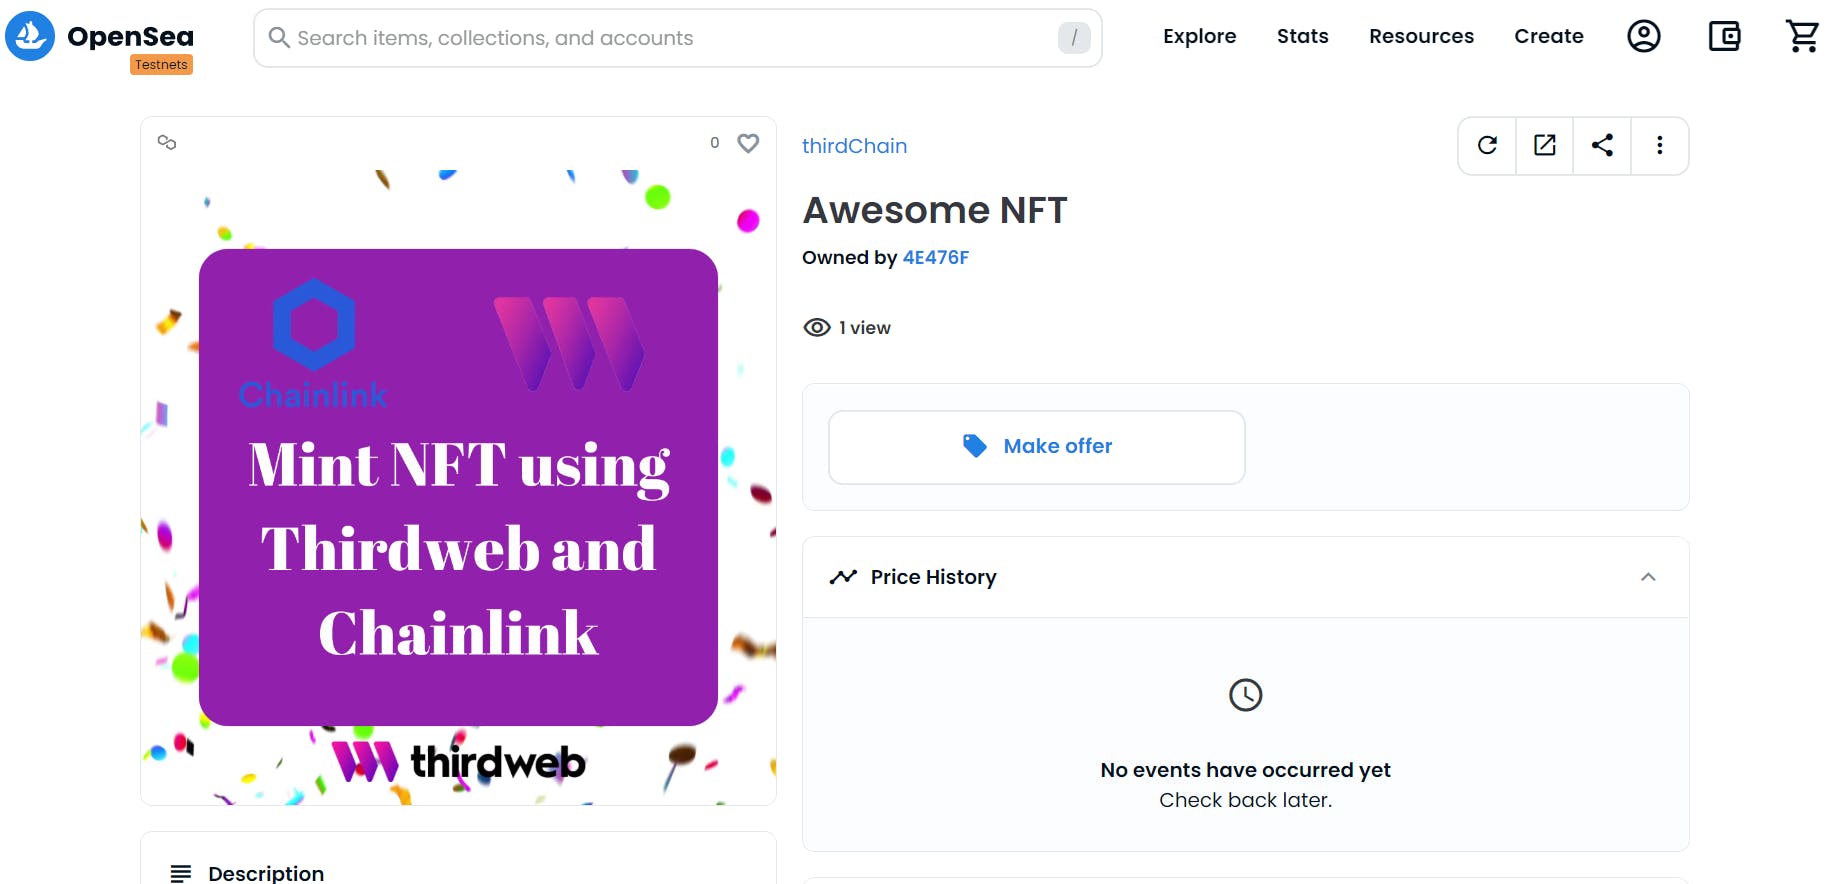
You have successfully minted the NFT and viewed it on opensea. You can share the link of opensea and brag about NFTs as all Web3 people do 😎.
Check Custom Errors
Enter the Native Token Value to mint the NFT. We will mint NFT without paying any Matic to check whether our code is working.
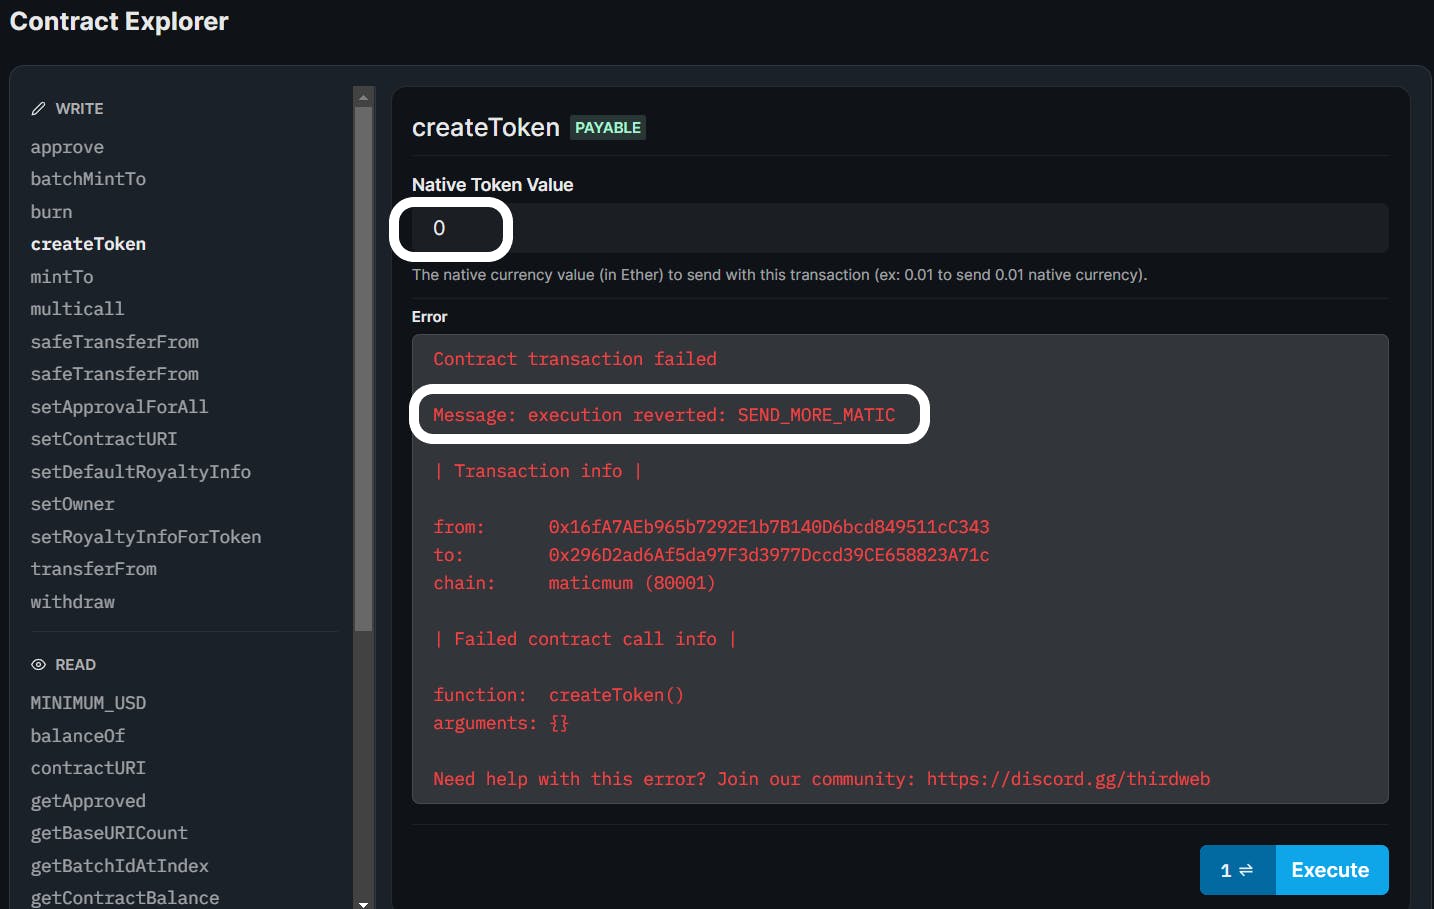
As you can see, it reverts the transaction with the SEND_MORE_MATIC, meaning our custom logic is working.
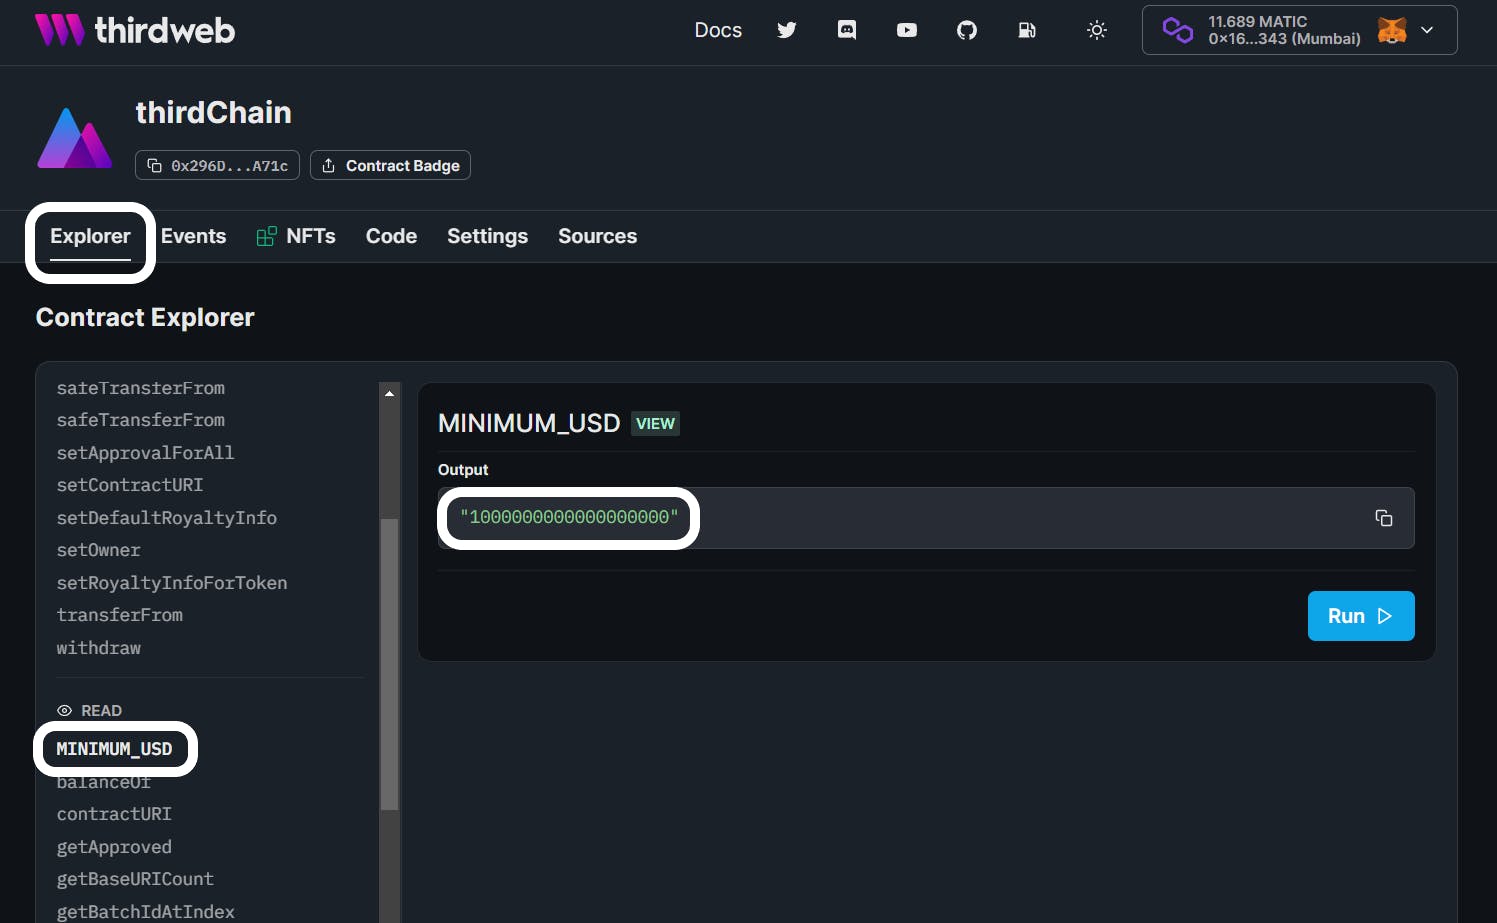
Getter Function
We have already seen how we can access and use the setter function in thirdweb. Now we will interact with the getter function. You can access the getter function by scrolling down on the explorer page and clicking on your custom MINIMUM_USD public Variable.
Now let's try to get the smart contract balance by checking the getContractBalance function.
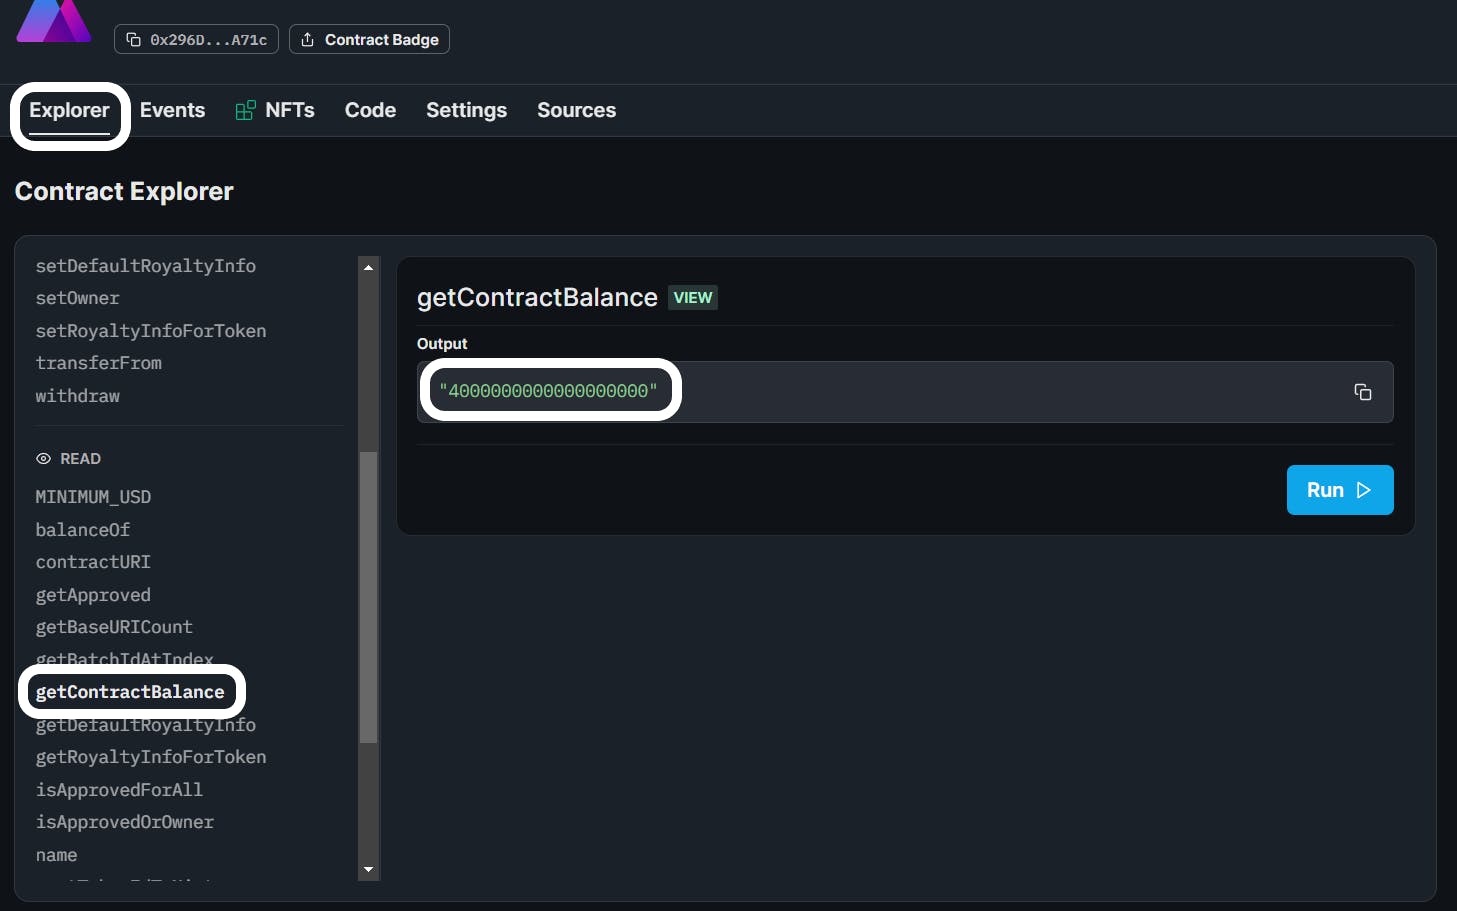
You can see you are getting the correct result.
🎉BOOM 🎉
You have completed the whole tutorial. Pat yourself on the back. You have learned about the following:
ERC-721 token standard
Build your custom smart contract using thirdweb ContractKit
Fetch the current price of Matic in USD by using Chainlink Data Feeds
Deploy your smart contract using thirdweb Deploy
Mint your NFT and interact with your smart contract using the Explorer section of the thirdweb Dashboard
💥 Simply WOW 💥
If you learned something and enjoyed this article: Please share this article with your friends.
I hope you learned something new or even solved a problem. Thanks for reading, and have fun!
You can follow me on Twitter, GitHub, and LinkedIn. Keep your suggestions/comments coming!
WAGMI 🚀🚀