This tutorial will teach you how to automate our smart contracts using Galeto Automate. We will build a LunchMoney DApp, which parents can use to send lunch money to their children every 24 hours.
What is Gelato
Gelato Network is a decentralized platform that allows developers to automate the execution of smart contracts on all major EVM-compatible blockchains, including Ethereum, Polygon, Fantom, Arbitrum, BNB Chain, Optimism, and many more. It also empowers builders to create augmented smart contracts that are gasless and off-chain aware.

What is Gelato Automate
Gelato Automate allows you to automate your smart contract executions in a reliable, developer-friendly & decentralized manner while leveraging off-chain data. The most significant advantage of Gelato is its easy-to-use Gelato Automate UI, which allows developers to easily automate the execution of smart contracts through a user-friendly interface.
Build
The main focus of this tutorial is to get familiar with Gelato. I assume you know how to create, compile and deploy the smart contract.
LunchMoney.sol
pragma solidity ^0.8.4;
error ONLYOWNER_CAN_CALL_THIS_FUNCTION();
error ADDRESS_CANT_BE_ZERO();
error AMOUNT_CANT_BE_ZERO();
error TIME_NOT_PASSED();
error FAILED_TO_SEND_ETHER();
contract LunchMoney{
address private receiver;
uint256 private lunchMoneyAmount;
address private owner;
uint private threshold;
uint private lastCall;
event Transfer(address receiver, uint lastCallTimestamp);
constructor() {
owner = msg.sender;
lastCall = block.timestamp;
}
modifier onlyOwner() {
if(msg.sender != owner){
revert ONLYOWNER_CAN_CALL_THIS_FUNCTION();
}
_;
}
function setReceiverAddress(address _receiver) public onlyOwner {
if(_receiver == address(0x0)){
revert ADDRESS_CANT_BE_ZERO();
}
receiver = _receiver;
}
function setLunchMoneyAmount(uint256 _amount) public onlyOwner {
if(_amount == 0){
revert AMOUNT_CANT_BE_ZERO();
}
lunchMoneyAmount = _amount;
}
function setThreshold(uint256 _min) public onlyOwner {
threshold = _min * 60 ;
}
function transferLunchMoney() public {
if(block.timestamp < lastCall + threshold){
revert TIME_NOT_PASSED();
}
(bool sent, ) = receiver.call{value: lunchMoneyAmount}("");
if(!sent){
revert FAILED_TO_SEND_ETHER();
}
lastCall = block.timestamp;
emit Transfer(receiver, lastCall);
}
function withdraw() public onlyOwner {
(bool sent, ) = owner.call{value: address(this).balance}("");
if(!sent){
revert FAILED_TO_SEND_ETHER();
}
}
function getThreshold() public view returns(uint){
return threshold;
}
function getBalance() public view returns(uint){
return address(this).balance;
}
function getReceiver() public view returns(address){
return receiver;
}
function getLunchAmount() public view returns(uint){
return lunchMoneyAmount;
}
function getLastCall() public view returns(uint){
return lastCall;
}
function getOwner() public view returns(address){
return owner;
}
function getTimeRemaining() public view returns(uint){
return lastCall + threshold - block.timestamp;
}
receive() external payable {}
fallback() external payable {}
}
Remember, the function you want to automate (called by the Gelato Network) needs to be public or external and accessible to anyone. To improve security, you can add the Gelato address to your allowlist (0x217e5926B11B189cd702CeAB32fdb211a937C4DB). Only the owner of the smart contract or this address can call the function you want to automate.
GitHub Link
You can check all the code, scripts, and packages with this GitHub repository.
We will deploy our smart contract on the Polygon Mumbai testnet. You can get the Mumbai RPC URL using QuickNode and the Polygonscan API key to verify the smart contract by visiting https://polygonscan.com/myapikey.
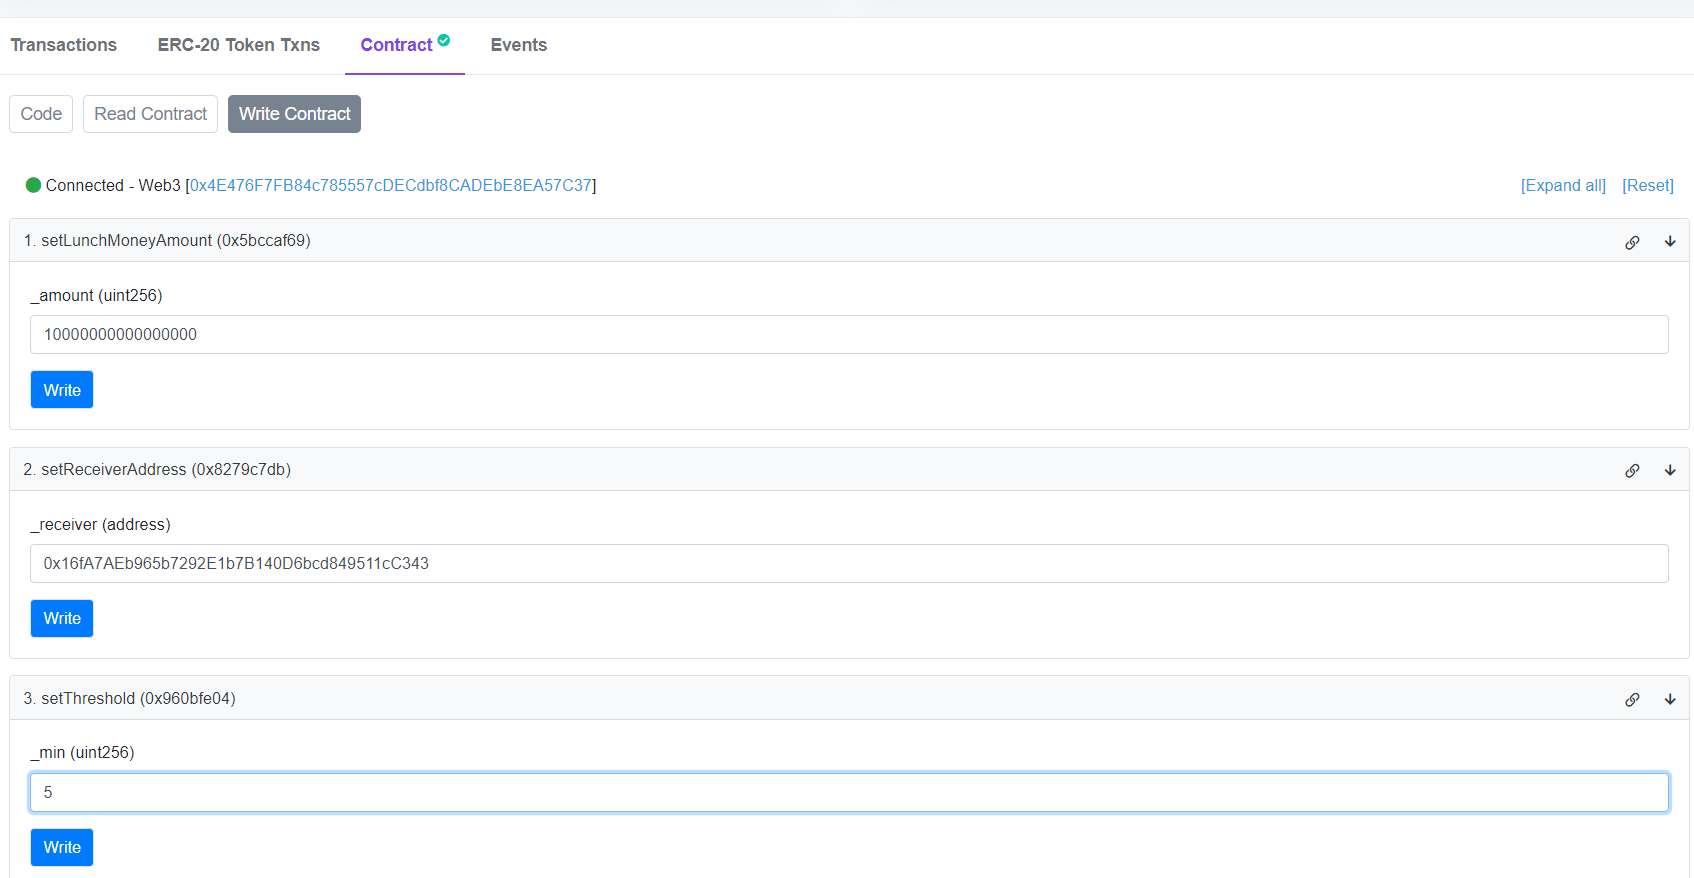
After deploying and verifying the smart contract. Set values to our smart contract using Polygonscan Mumbai.
It should look like this:
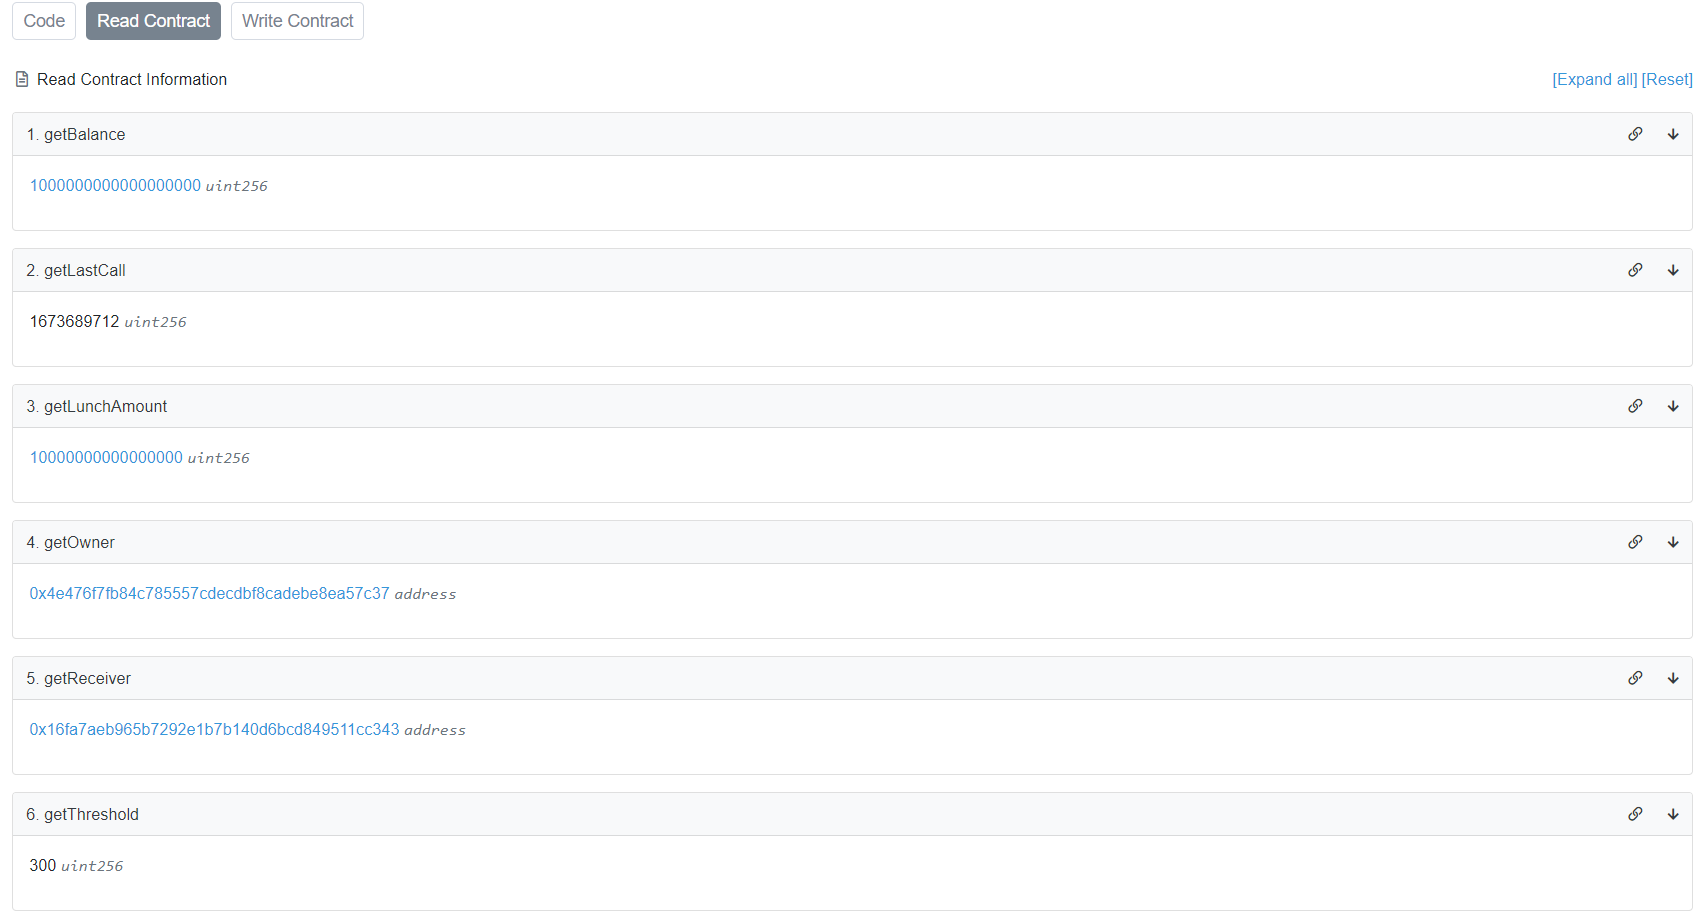
After setting values, Now check the values in the "Read Contract" section.
It should look like this:
Don't forget the fund your smart contract. Otherwise, your child can't buy lunch 😐
Using Gelato Automate
Now Let's automate our smart contract using Gelato Automate.
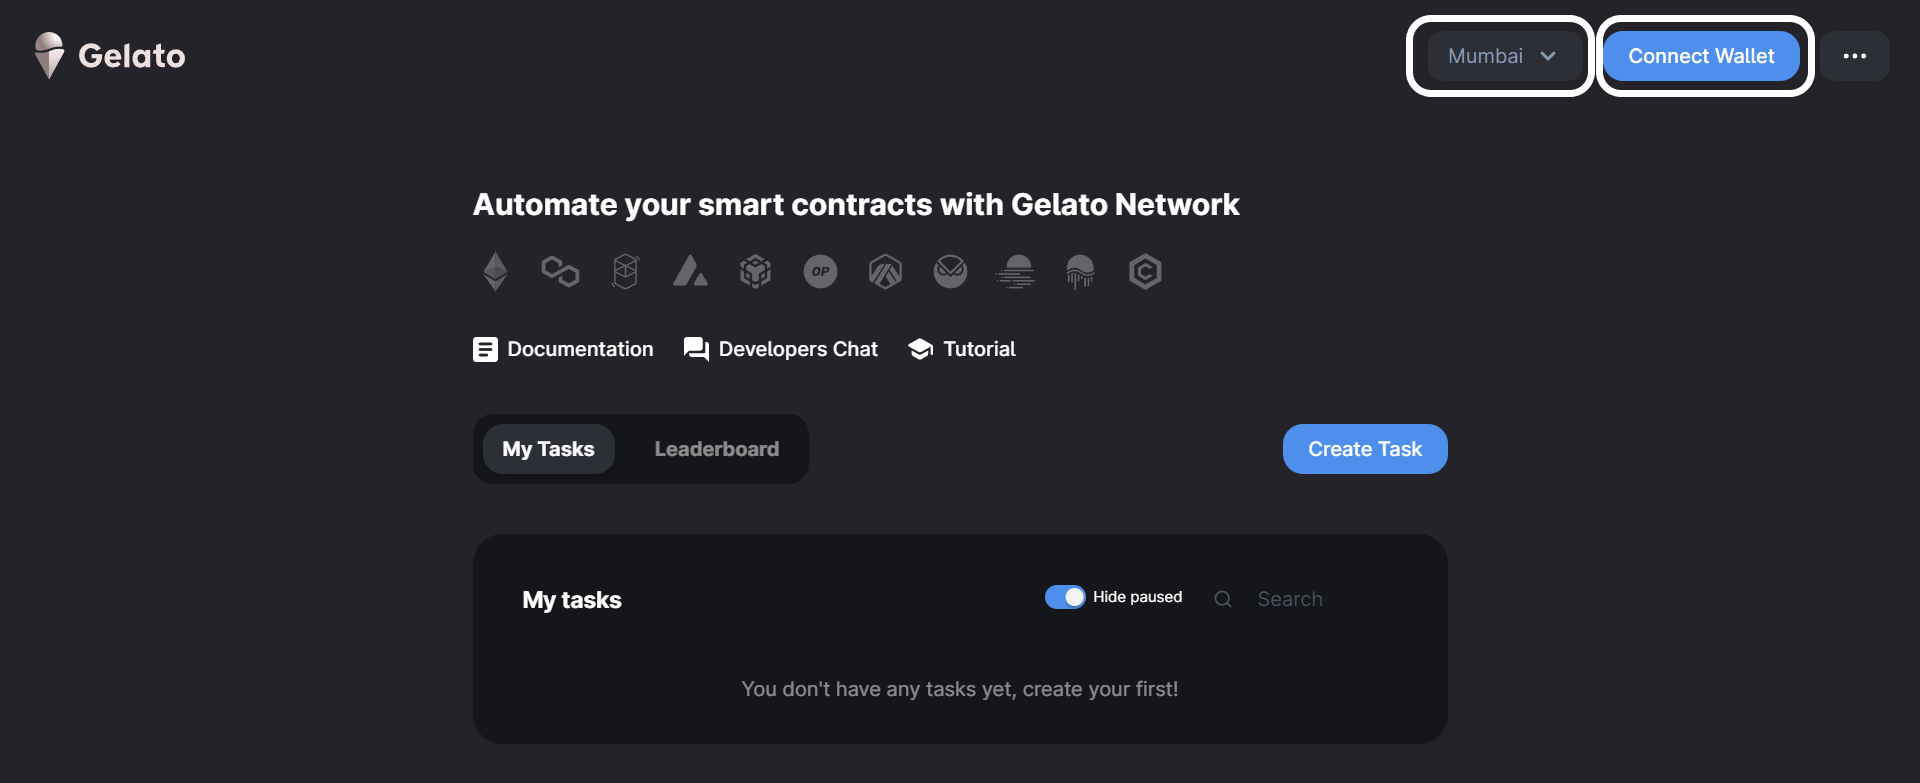
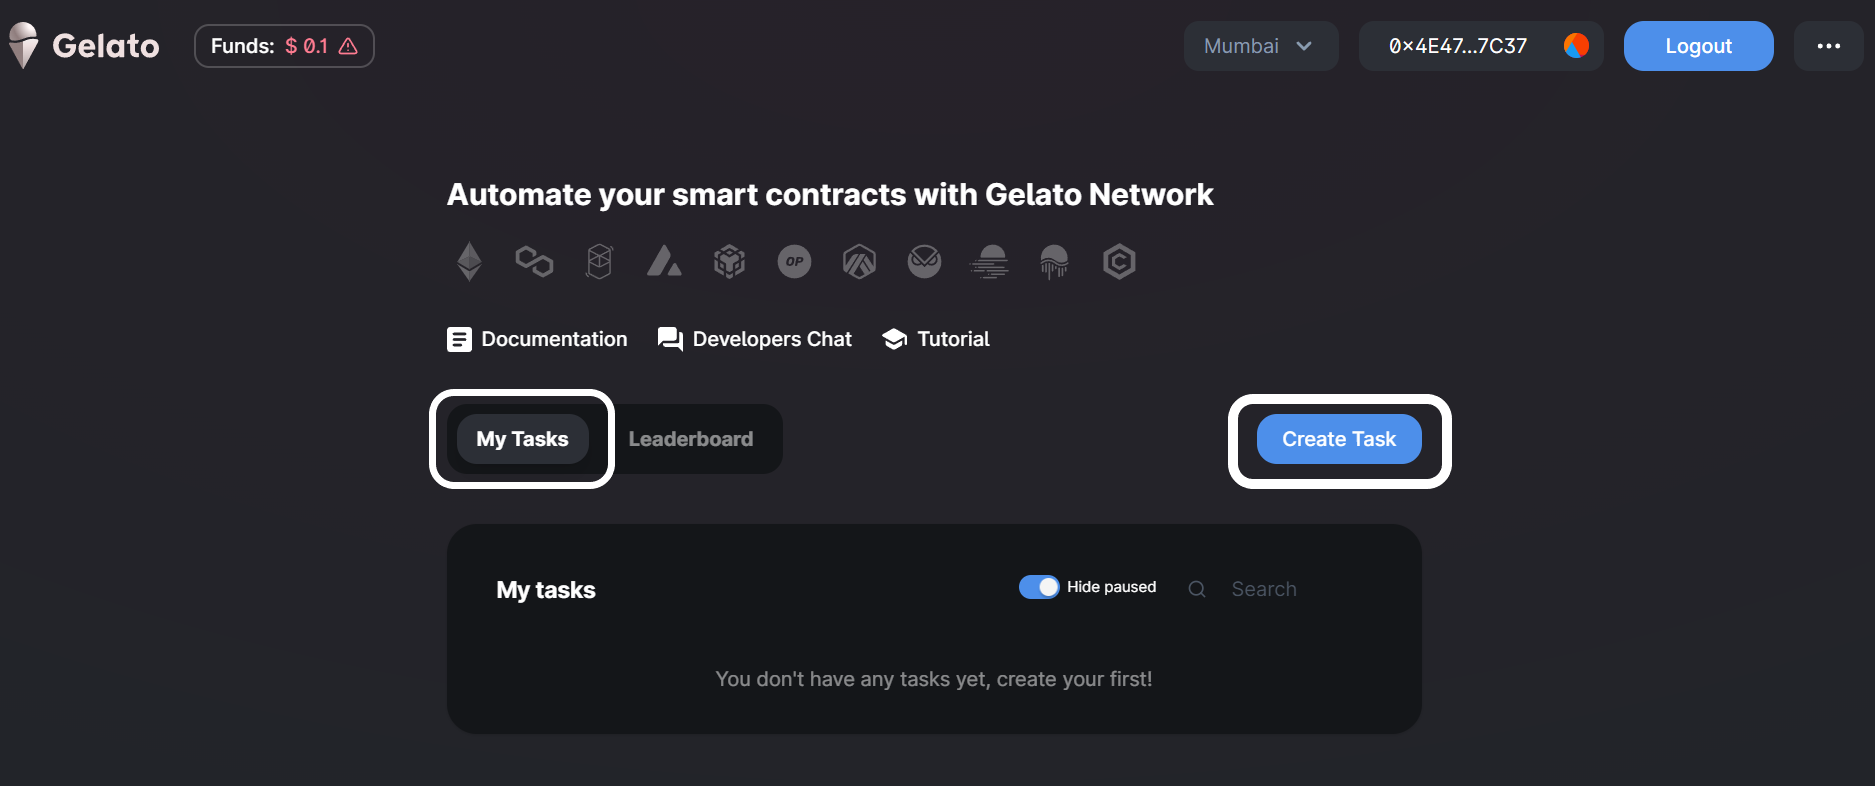
Click on this link https://app.gelato.network/ to visit "Gelato Automate UI". Select the network to which your smart contract is deployed and connect your wallet with Gelato.
Click on the "Create Task" Button.
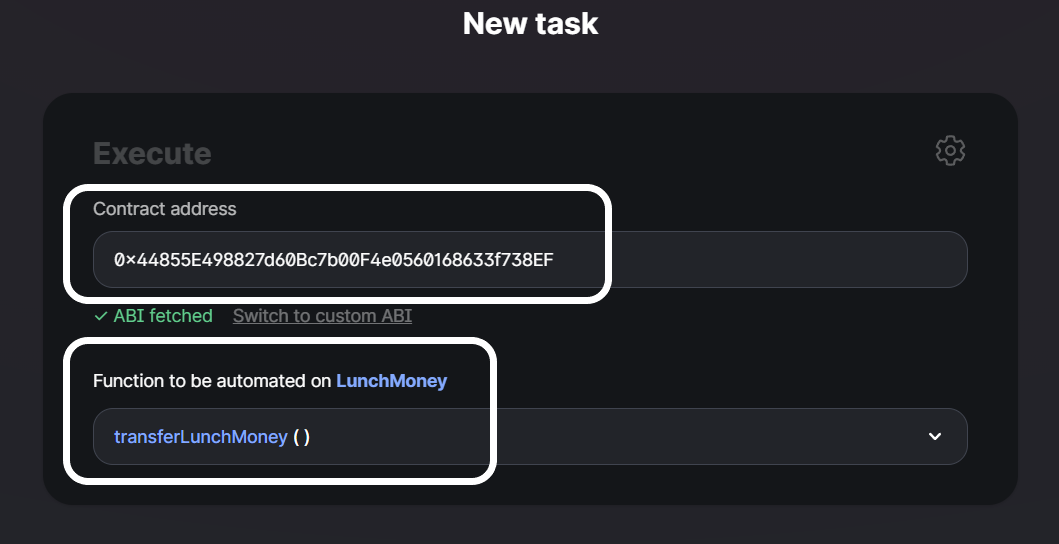
Enter the smart contract address and the function you want to automate.
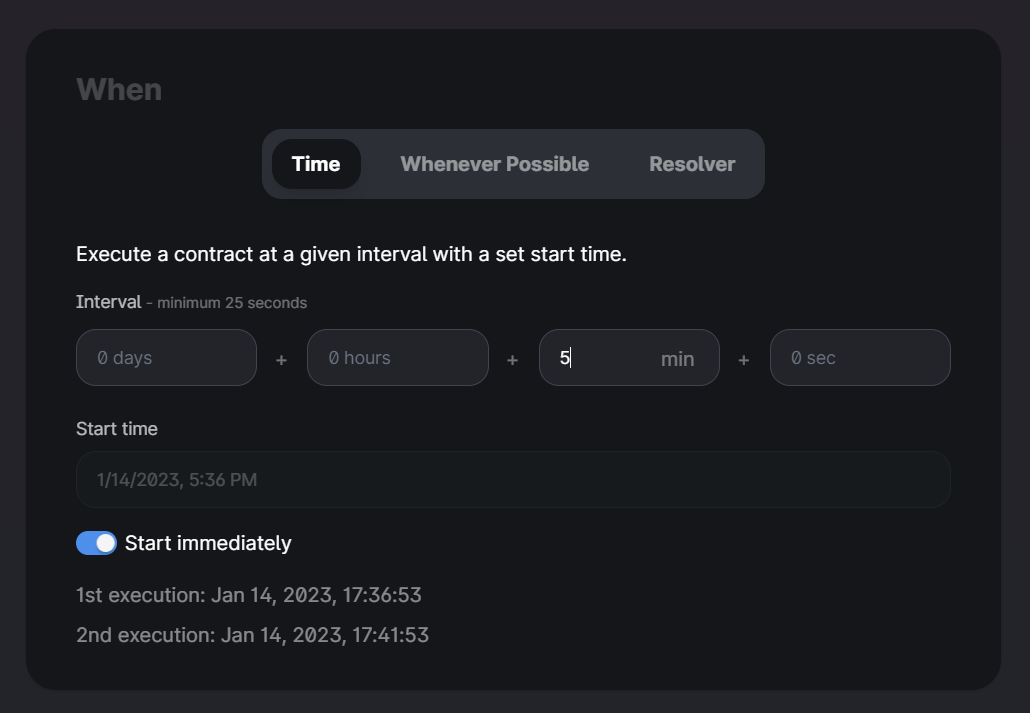
Enter the time interval you want to call the function. In our case, we will enter 5 minutes for testing and 24 hours for production.
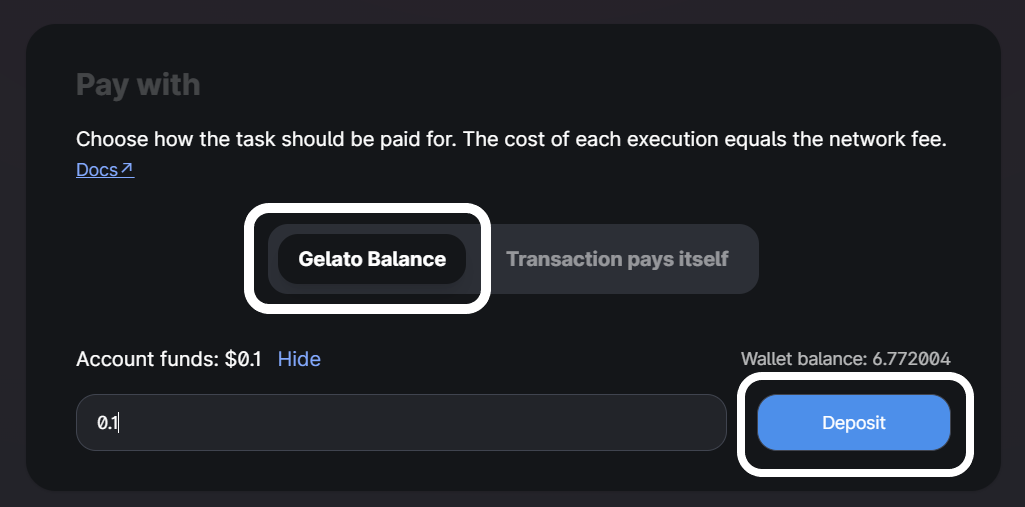
Fund the task to call the smart contract function. Enter the amount in the network native token (Ethereum -> ETH, Polygon -> Matic) and Click on the "Deposit" button.
As you know, every transaction costs gas. Therefore we have to fund our task so function execution can occur smoothly. The cost of each execution equals the network fee.
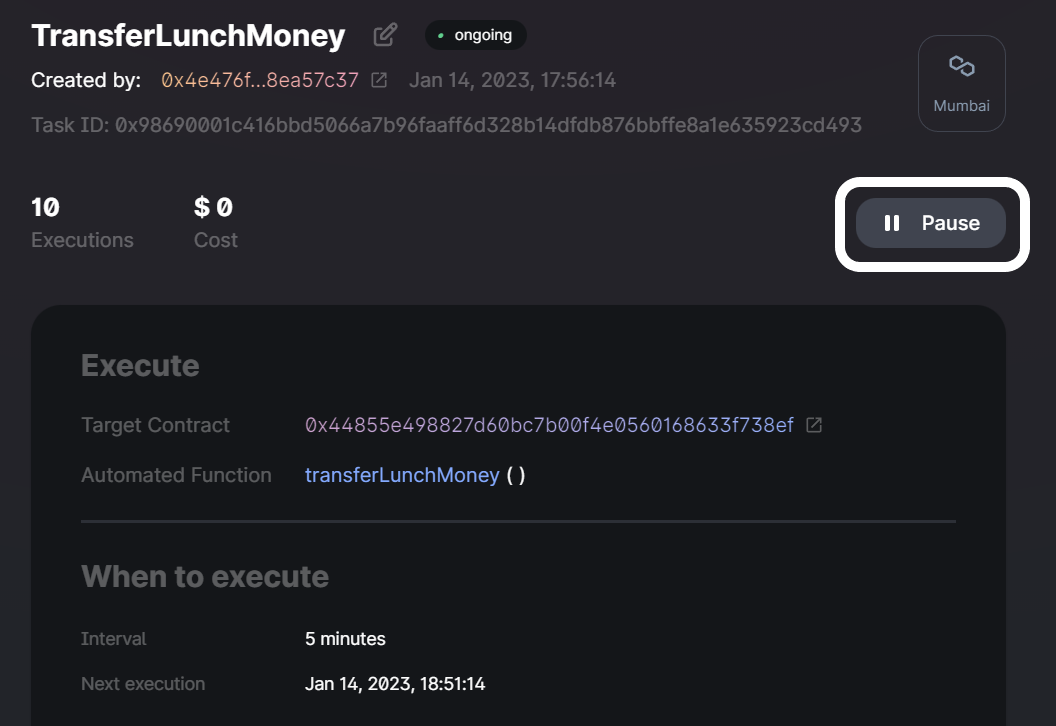
Enter the task name; it will show some suggested names based on your contract. It is helpful to track multiple tasks.

Click the "Create Task" button and sign a transaction to create your task on-chain. Once your task creation transaction has been confirmed you will be redirected to the task page.
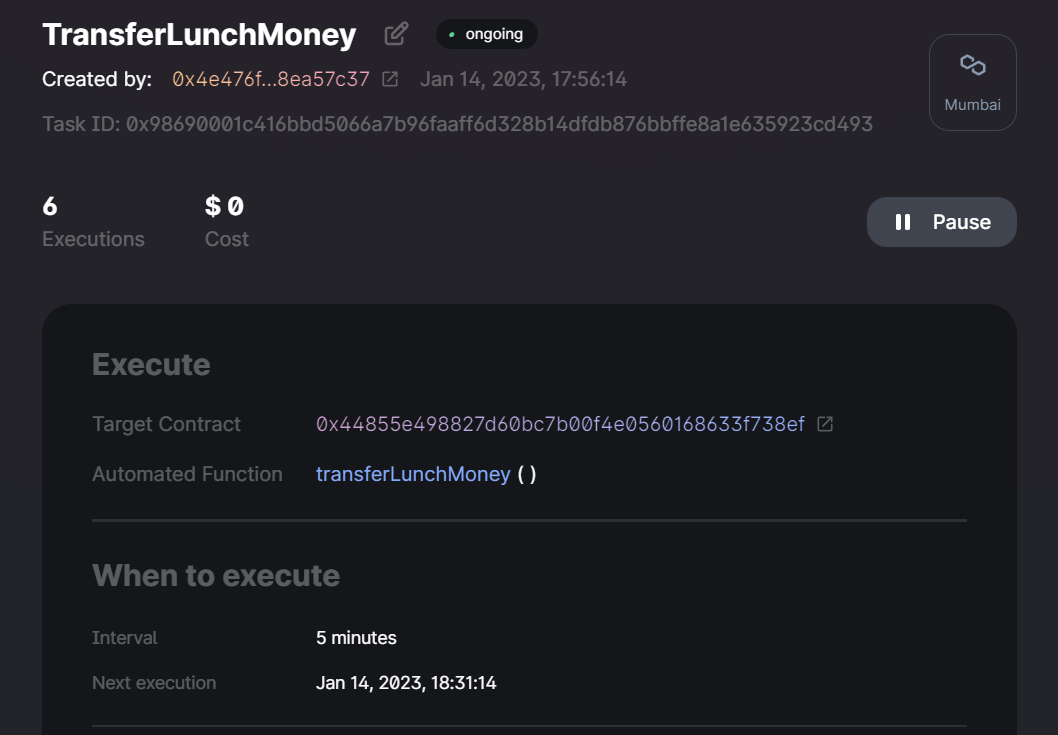
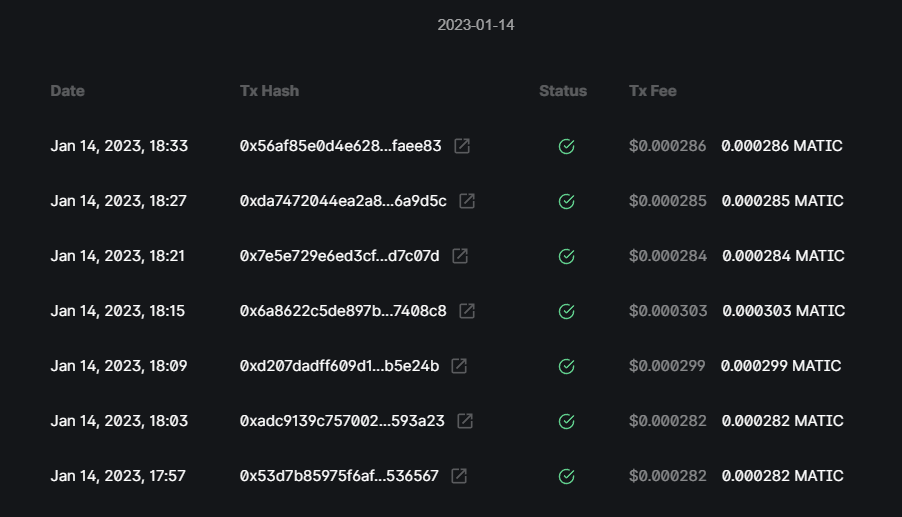
You can view all the execution and task log details.
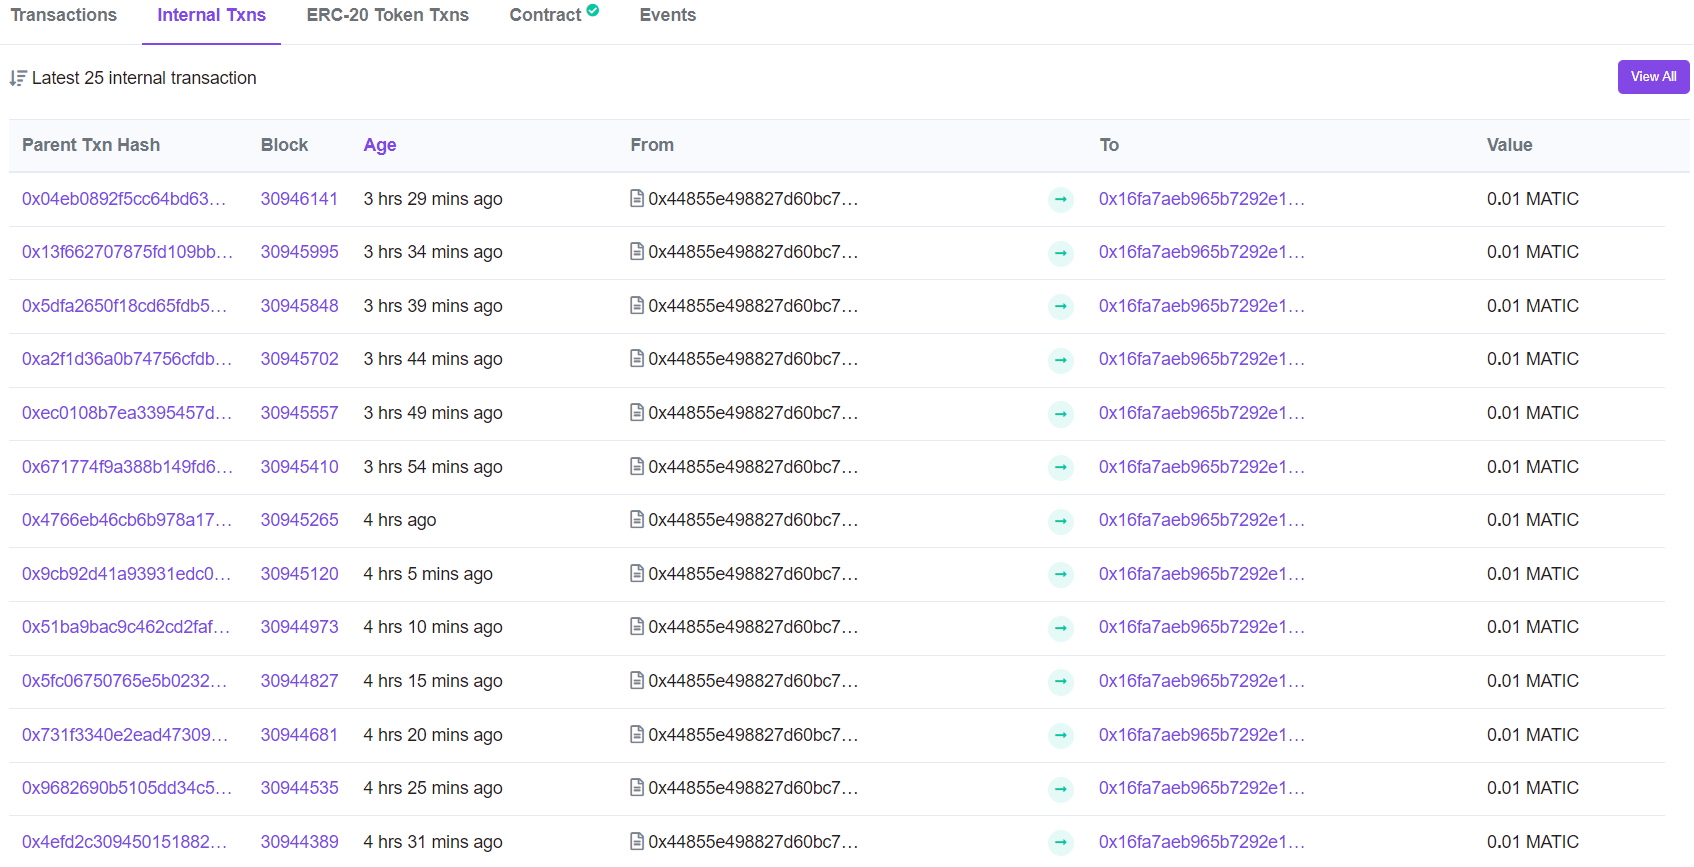
You can also view the internal transactions on Polygonscan to double-check that everything is working according to the plan.
You can pause your task by clicking on the "Pause" button. Kids don't need lunch money on weekends.
🎉BOOM 🎉
You have completed the whole tutorial. Give yourself a pat on the back. You have
- Write a smart contract to transfer lunch money.
- Deploy the smart contract on the Mumbai Test network.
- Learned about the Gelato network and Gelato Automate UI.
- Automate your smart contract using Gelato Automate UI.
💥 Simply WOW 💥
If you learn and enjoy this article. Please share this article with your friends. I hope you learned something new or even solved a problem. Thanks for reading, and have fun!
You can follow me on Twitter, GitHub, and LinkedIn. Keep your suggestions/comments coming!
WAGMI 🚀🚀