In this comprehensive tutorial, we'll walk through the process of building a token-gated community for live concerts using QuickNode. We will create a custom token on the Ethereum network, develop a smart contract for the community, and design a frontend interface using QuickNode's API. This platform will allow concert organizers to offer exclusive live concert access to token holders.

Prerequisites
Basic understanding of Ethereum, Solidity, and smart contracts
Familiarity with JavaScript and web development
Node.js and npm installed on your local machine
MetaMask or another Ethereum-compatible wallet
Step 1: Setting up the project
As our first step, we will create a smart contract in Solidity for the token we later use for the gating.
1.1 Installing dependencies
To begin, make sure you have Node.js installed. I recommend using the latest LTS (Long Term Support) version. You can install the LTS version using the following commands:
nvm install --lts
nvm use --lts
Next, install Truffle, a popular development framework for Ethereum, globally:
npm install -g truffle
1.2 Creating a new Truffle project
Create a new directory for your project and initialize a new Truffle project:
mkdir tokengated-community
cd tokengated-community
truffle init
1.3 Installing the OpenZeppelin Contracts library
To create the custom FanToken (FTK), we will use the OpenZeppelin Contracts library, which provides a secure and audited implementation of the ERC20 token standard. Install the library as a dependency:
npm install @openzeppelin/contracts
1.4 Creating the FanToken contract
Create a new file named FanToken.sol in the contracts directory and add the following code:
pragma solidity ^0.8.0;

import "@openzeppelin/contracts/token/ERC20/ERC20.sol";

contract FanToken is ERC20 {
    constructor(uint256 initialSupply) ERC20("FanToken", "FTK") {
        _mint(msg.sender, initialSupply);
    }
}
Open the truffle-config.js file in the root directory of your project and update the compilers section to use the correct Solidity version, which should match the version specified in your FanToken.sol file. In this case, set it to 0.8.0 or higher:
compilers: {
solc: {
version: "^0.8.0",
settings: {
optimizer: {
enabled: true,
runs: 200
}
}
}
}
Save the truffle-config.js file.
Now that we created the FanToken contract and configured the Truffle project correctly, we can proceed with the subsequent steps to create the token-gated community contract and develop the front-end interface for live concert access.
In the contracts directory, create a new file named TokengatedCommunity.sol and add the following Solidity code to create a smart contract that governs the rules of the token gate community:
pragma solidity ^0.8.0;
import "@openzeppelin/contracts/token/ERC20/IERC20.sol";
import "@openzeppelin/contracts/access/Ownable.sol";
contract TokengatedCommunity is Ownable {
IERC20 public fanToken;
uint256 public entryTokenAmount;
mapping(address => bool) public members;
event MemberJoined(address indexed member);
constructor(address _fanToken, uint256 _entryTokenAmount) {
fanToken = IERC20(_fanToken);
entryTokenAmount = _entryTokenAmount;
}
function joinCommunity() external {
require(!members[msg.sender], "Already a member");
require(fanToken.balanceOf(msg.sender) >= entryTokenAmount, "Insufficient token balance");
members[msg.sender] = true;
emit MemberJoined(msg.sender);
}
function setEntryTokenAmount(uint256 _newEntryTokenAmount) external onlyOwner {
entryTokenAmount = _newEntryTokenAmount;
}
function isMember(address _user) external view returns (bool) {
return members[_user];
}
}
In the migrations directory, create a new file named 3_deploy_community.js and add the following code to deploy the community contract:
const TokengatedCommunity = artifacts.require("TokengatedCommunity");
const FanToken = artifacts.require("FanToken");
module.exports = async function (deployer, _network, accounts) {
const tokenInstance = await FanToken.deployed();
await deployer.deploy(TokengatedCommunity, tokenInstance.address, "1000000000000000000");
};
Run the following command to deploy the community contract to the Ethereum mainnet:
truffle migrate --network mainnet
Take note of the deployed community contract address for future use.
Step 3: Creating a front-end interface
The contract is ready to go; now we need a UI.
3.1 Setting up a React project
Create a new React project using create-react-app:
npx create-react-app tokengated-community-frontend
cd tokengated-community-frontend
3.2 Installing dependencies
Install the necessary dependencies for the frontend:
npm install ethers web3modal @openzeppelin/contracts
3.3 Creating a Web3Modal component
In the src directory, create a new file named Web3Modal.js and add the following code to create a Web3Modal component that connects to Ethereum wallets:
import React, { useState, useEffect } from "react";
import Web3Modal from "web3modal";
import { ethers } from "ethers";

const Web3ModalComponent = () => {
  const [provider, setProvider] = useState(null);

  useEffect(() => {
    async function initWeb3Modal() {
      const web3Modal = new Web3Modal();
      const _provider = await web3Modal.connect();
      setProvider(new ethers.providers.Web3Provider(_provider));
    }

    if (!provider) {
      initWeb3Modal();
    }
  }, [provider]);

  return (
    <div>
      {provider ? (
        <div>Connected to Ethereum</div>
      ) : (
        <div>Connect to your Ethereum wallet</div>
      )}
    </div>
  );
};

export default Web3ModalComponent;
In the src directory, create a new file named TokengatedCommunity.js and add the following code to create a component that allows users to join the community and view exclusive content:
import React, { useState, useEffect } from "react";
import { ethers } from "ethers";
import FanToken from "./contracts/FanToken.json";
import TokengatedCommunity from "./contracts/TokengatedCommunity.json";

const TokengatedCommunityComponent = ({ provider }) => {
  const [userAddress, setUserAddress] = useState("");
  const [isMember, setIsMember] = useState(false);
  const [fanTokenContract, setFanTokenContract] = useState(null);
  const [communityContract, setCommunityContract] = useState(null);

  useEffect(() => {
    async function initContracts() {
      if (provider) {
        const signer = provider.getSigner();
        const user = await signer.getAddress();
        setUserAddress(user);

        const fanToken = new ethers.Contract(FanToken.networks[1].address, FanToken.abi, signer);
        setFanTokenContract(fanToken);

        const community = new ethers.Contract(TokengatedCommunity.networks[1].address, TokengatedCommunity.abi, signer);
        setCommunityContract(community);

        const _isMember = await community.isMember(user);
        setIsMember(_isMember);
      }
    }

    initContracts();
  }, [provider]);

  async function joinCommunity() {
    if (communityContract) {
      await communityContract.joinCommunity();
      setIsMember(true);
    }
  }

  return (
    <div>
      {isMember ? (
        <div>
          <h2>Welcome to the exclusive content area!</h2>
          <p>Here, you can access exclusive content and interact with the artist.</p>
        </div>
      ) : (
        <div>
          <h2>Join the Tokengated Community</h2>
          <p>
            To access exclusive content, you must hold at least 1 FTK in your wallet.
          </p>
            <button onClick={joinCommunity}>Join Community</button>
        </div>
    )}
    </div>
     );
  };

export default TokengatedCommunityComponent;
3.5 Updating the App component
Update the src/App.js file to include the Web3Modal and TokengatedCommunity components:
import React from "react";
import Web3ModalComponent from "./Web3Modal";
import TokengatedCommunityComponent from "./TokengatedCommunity";

function App() {
  const [provider, setProvider] = useState(null);

  const handleProvider = (newProvider) => {
    setProvider(newProvider);
  };

  return (
    <div>
      <Web3ModalComponent onProvider={handleProvider} />
      <TokengatedCommunityComponent provider={provider} />
    </div>
  );
}

export default App;
Step 4: Running the frontend
Start the React development server to run the frontend:
npm start
The token-gated community platform is now accessible at http://localhost:3000. Users can connect their Ethereum wallets, join the community, and access exclusive content.
In the src directory, modify the TokengatedCommunity.js file to create a component that allows users to join the community and access the exclusive live concert stream.
First, inside the TokengatedCommunityComponent function, add a new state variable isConcertLive to manage the live concert status:
const [isConcertLive, setIsConcertLive] = useState(false);
Then, add the following useEffect hook inside the TokengatedCommunityComponent function, after the existing useEffect hook, to periodically check if the concert is live:
useEffect(() => {
  async function checkConcertStatus() {
    if (communityContract) {
      const liveStatus = await communityContract.isConcertLive();
      setIsConcertLive(liveStatus);
    }
  }

  const intervalId = setInterval(() => {
    checkConcertStatus();
  }, 5000);

  return () => clearInterval(intervalId);
}, [communityContract]);
Update the return statement of the TokengatedCommunityComponent function to display the live concert stream for members when the concert is live:
return (
<div>
{isMember ? (
<div>
{isConcertLive ? (
<div>
<h2>Welcome to the exclusive live concert!</h2>
<p>
Enjoy the live stream and exclusive content only available to
token holders.
</p>
{/* Embed the live concert stream here */}
</div>
) : (
<div>
<h2>Exclusive Live Concert Coming Soon</h2>
<p>
As a member of the token-gated community, you will have access to
the live concert when it starts.
</p>
</div>
)}
</div>
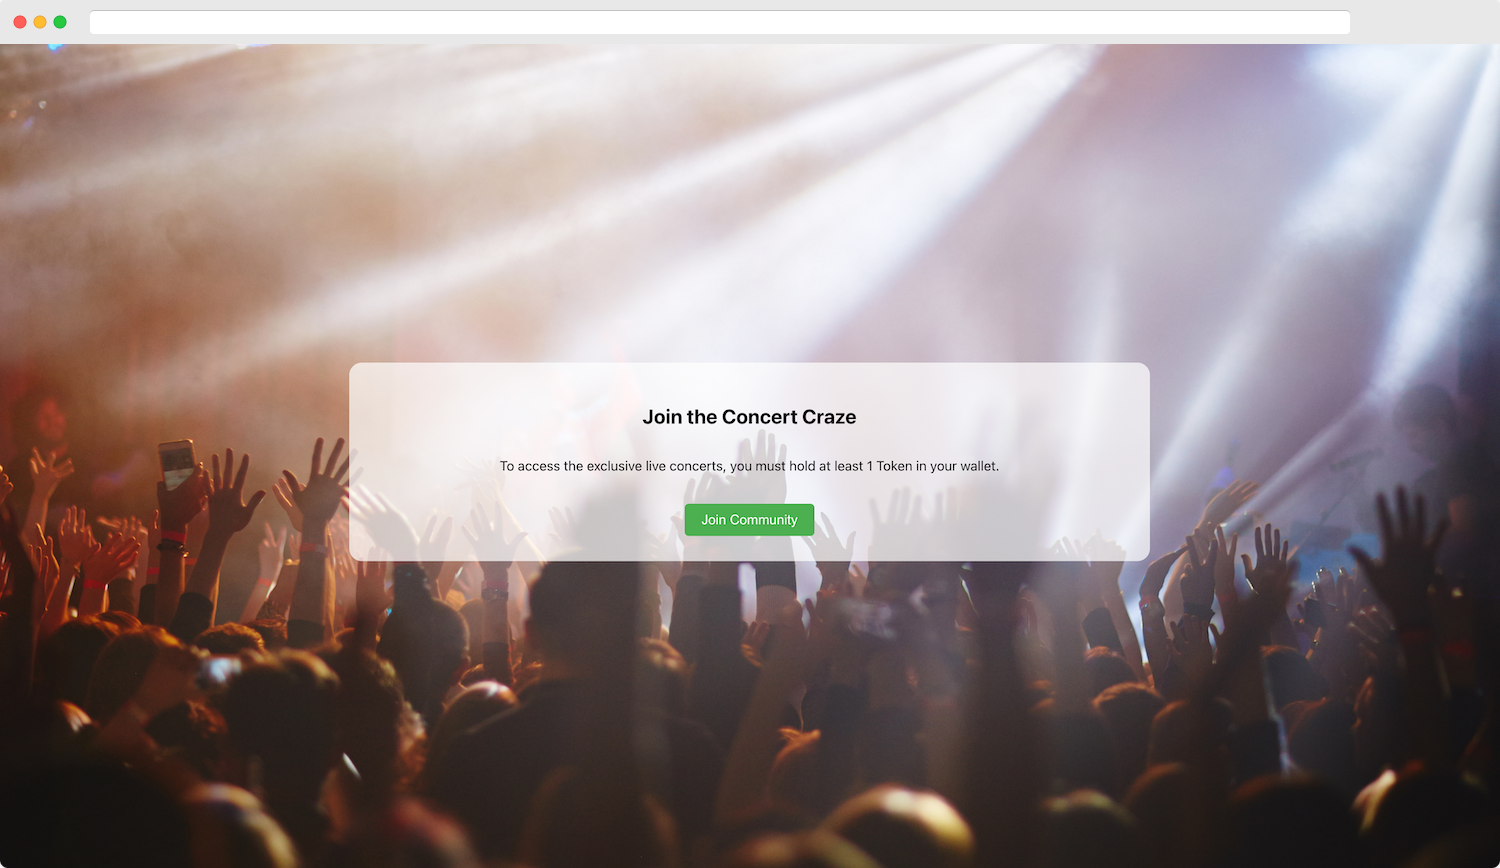
) : (
<div>
<h2>Join the Tokengated Community</h2>
<p>
To access the exclusive live concert, you must hold at least 1 FTK in
your wallet.
</p>
<button onClick={joinCommunity}>Join Community</button>
</div>
)}
</div>
);
With these changes, the TokengatedCommunityComponent will now allow users to access the exclusive live concert stream when it is live.
In the TokengatedCommunity contract, add the new state variable and function to manage the live concert status:
Add a new state variable, isConcertLive to manage the live concert status:
bool public isConcertLive;
Add a new function, setConcertStatus to allow the contract owner to set the concert's live status:
function setConcertStatus(bool _isConcertLive) external onlyOwner {
    isConcertLive = _isConcertLive;
}
Your updated TokengatedCommunity contract should include the isConcertLive state variable and the setConcertStatus function.
Deploy the updated contract to the Ethereum network using Truffle as described in the previous steps.
Github Repo
Conclusion
In this tutorial, we have demonstrated how to create a token-gated community platform with an exclusive live concert feature for members, utilizing QuickNode as the powerful and reliable Ethereum node infrastructure. We have covered the essential steps to set up smart contracts, deploy them to the Ethereum network, and create a front-end React application to interact with smart contracts.
By completing this tutorial, you have learned how to build a decentralized application that provides exclusive content to token holders, such as live concerts, and how to manage access to that content based on token ownership. QuickNode's high-performance Ethereum nodes make it easy to develop and scale various blockchain applications, ensuring fast and reliable interactions with the Ethereum network.
You can extend the platform by adding features like chat rooms, forums, or exclusive merchandise sales to engage your community further and incentivize token-holding. The possibilities are vast, and you can apply the skills you've acquired through this tutorial to build various token-powered platforms and communities, all while leveraging QuickNode's infrastructure for a seamless development experience.
Click Here to learn more about QuickNode